How to Make an Ultra Light Backpacking Stove with a Cat Food Can
Is Your Expensive Backpacking Stove Worth the Weight and Price?
We love making our own gear. Sometimes DIY hiking and backpacking gear saves us money, sometimes our projects don't turn out, and then sometimes we find a project that works so well we prefer it to our store-bought gear. One such project is our cat food can alcohol stove. There are countless variations and tutorials for DIY alcohol stoves, and we have experimented with many of them over the years. This cat food can stove is one of the easiest to build, most durable, and efficient versions we have tested. It works so well and weighs so little, you may ditch your expensive backpacking stove in favor of a cat food can stove on your next adventure.
Video Overview of the Cat Food Stove
Needed Tools and Materials
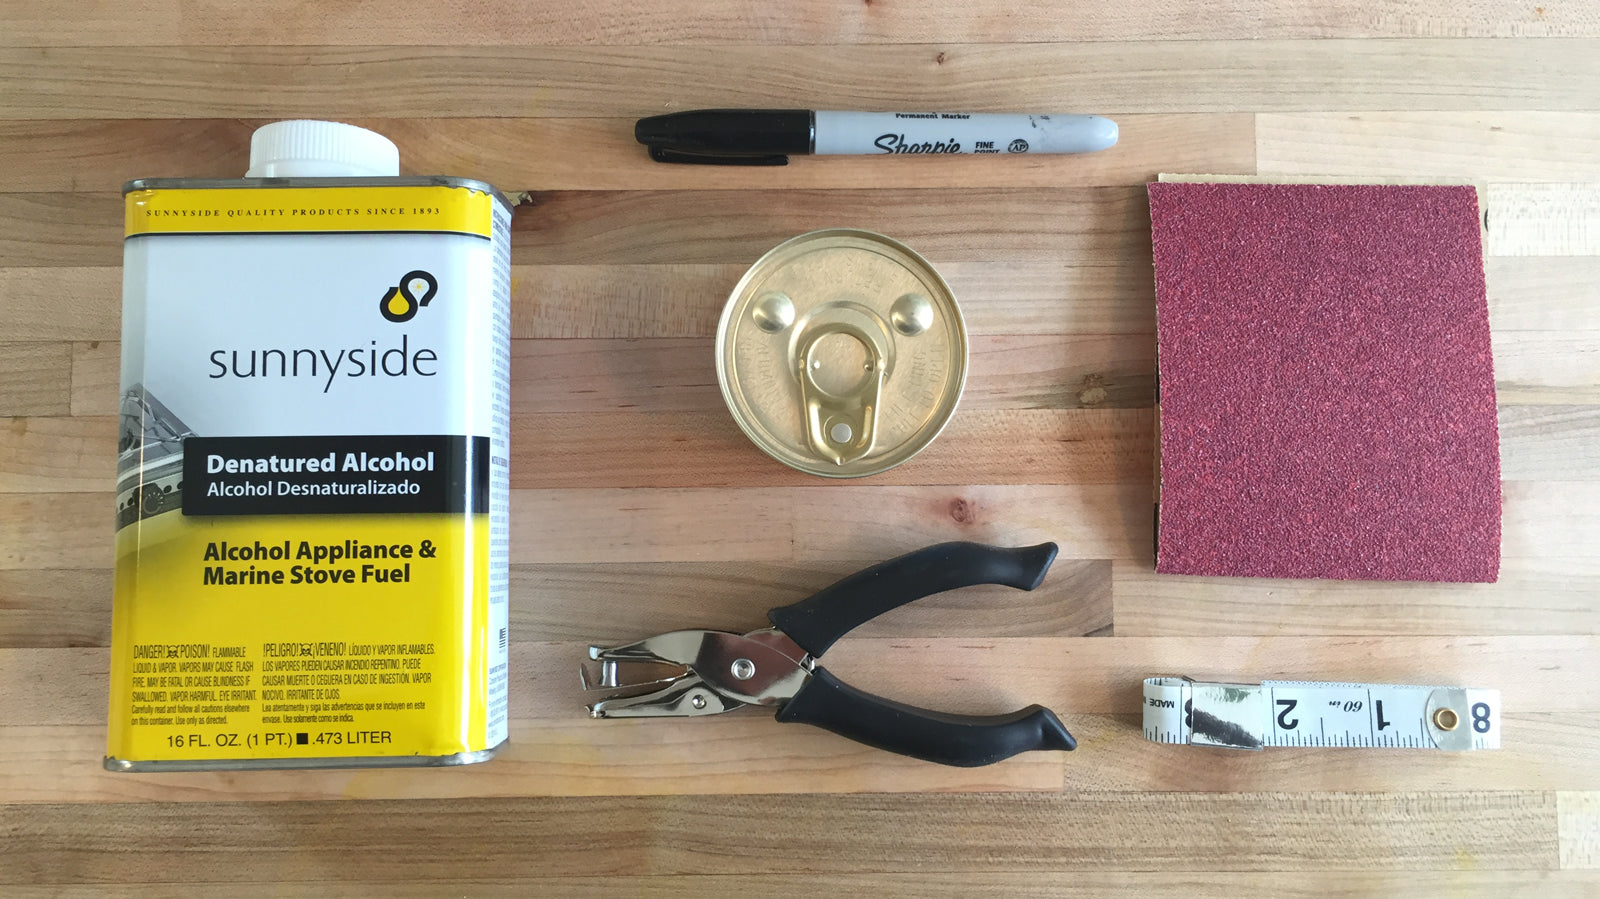
- Small can of cat food
- Flexible measuring tape
- Marker
- Hole punch
- Sand Paper
- Foil
- Denatured Alcohol
Step 1: Clean the Cat Food Can
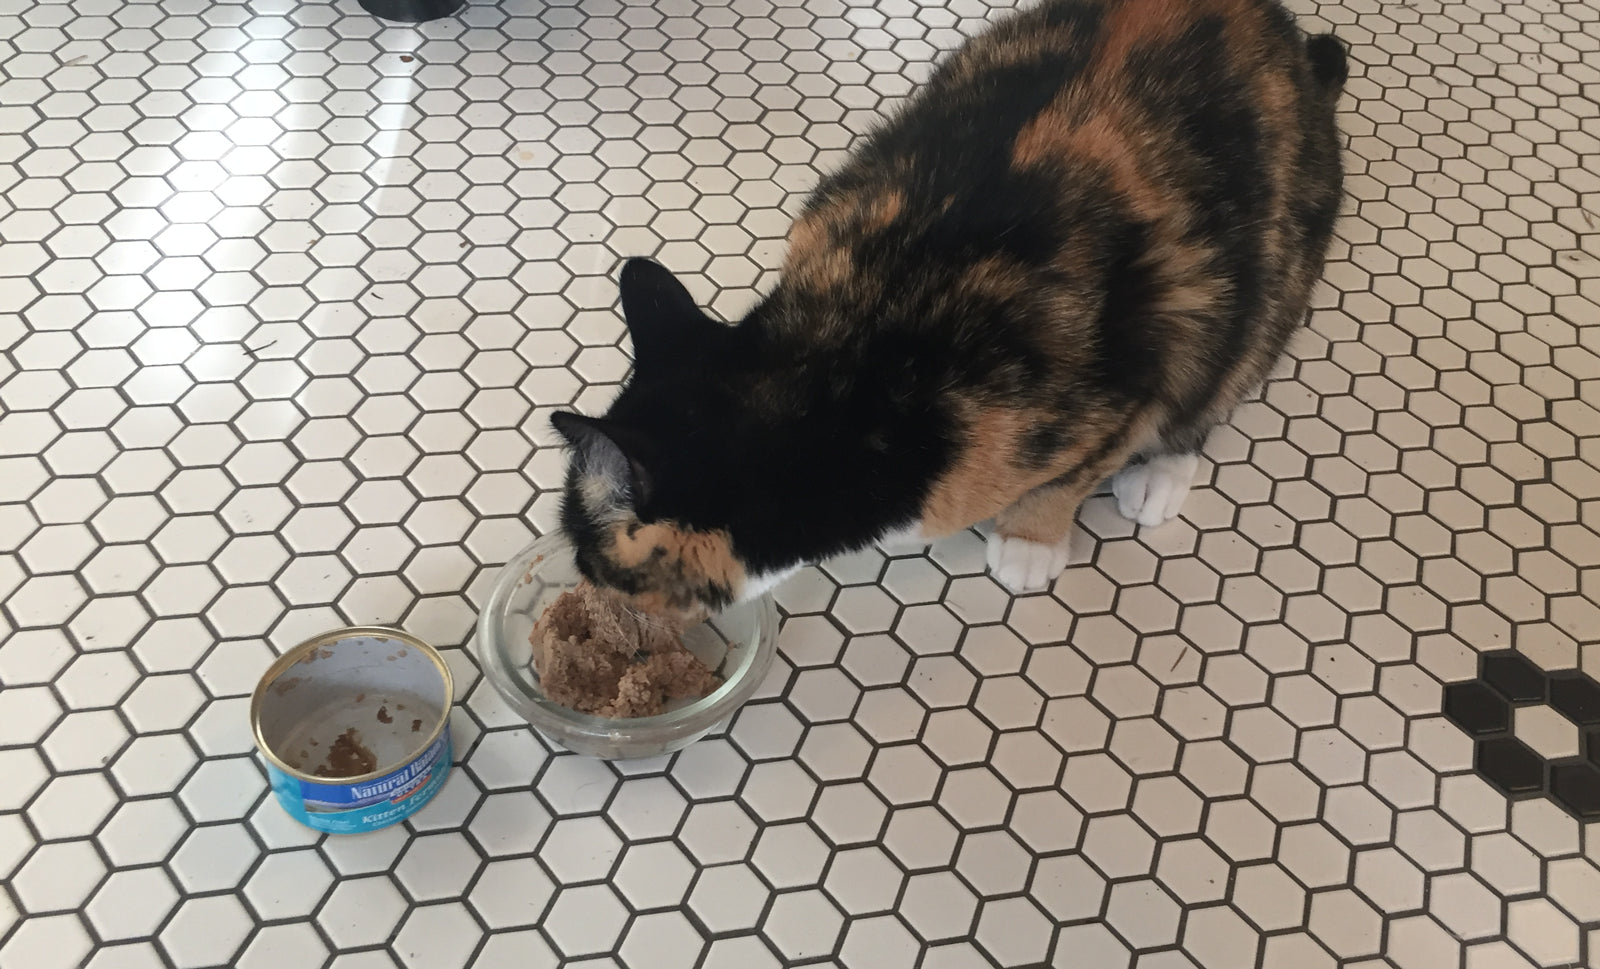
Open the cat food. Remove the contents and paper label, then wash with soap and hot water.
Pro-tip: If you don't have a cat, ask a friend to save a couple of empty cat food cans for you.
Step 2: Smooth the Sharp Edge
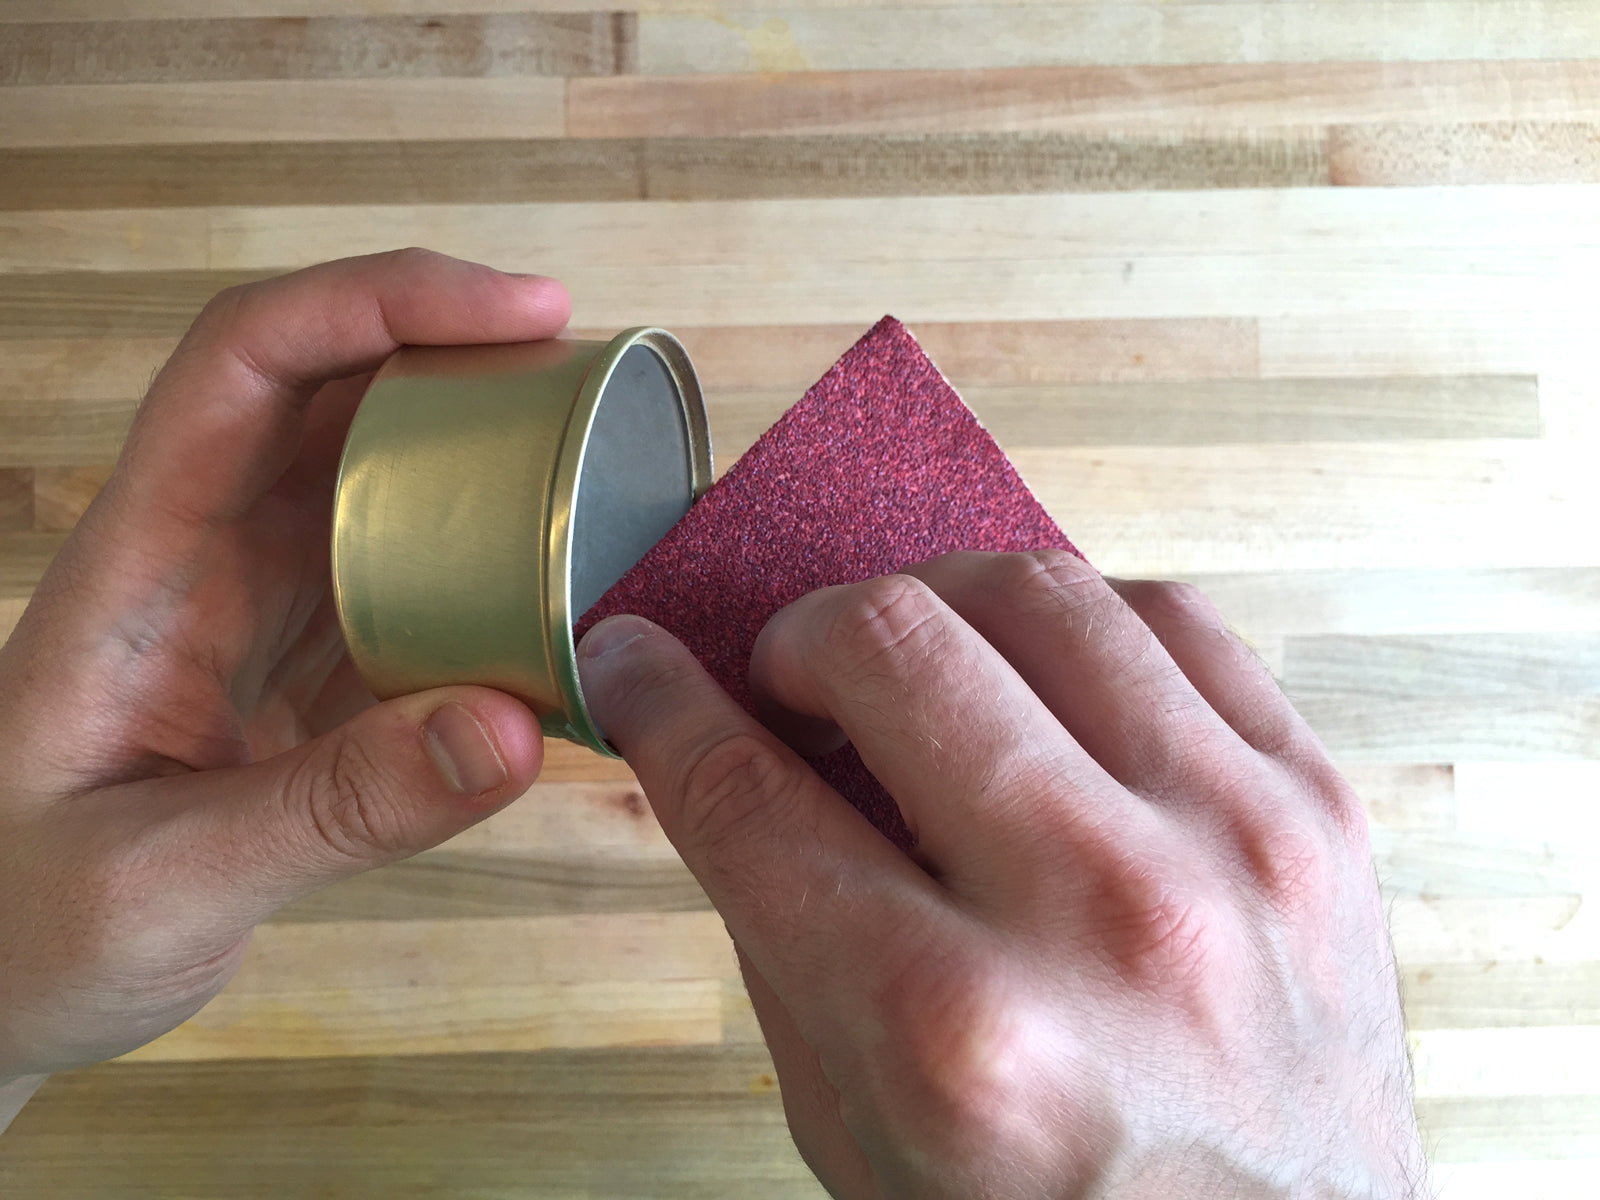
To ensure you don't cut your fingers while working on this project or while using your cat food can backpacking stove in the backcountry, smooth the sharp edge with a file or coarse sandpaper.
Step 3: Mark the Rim of the Can Every 1/2"
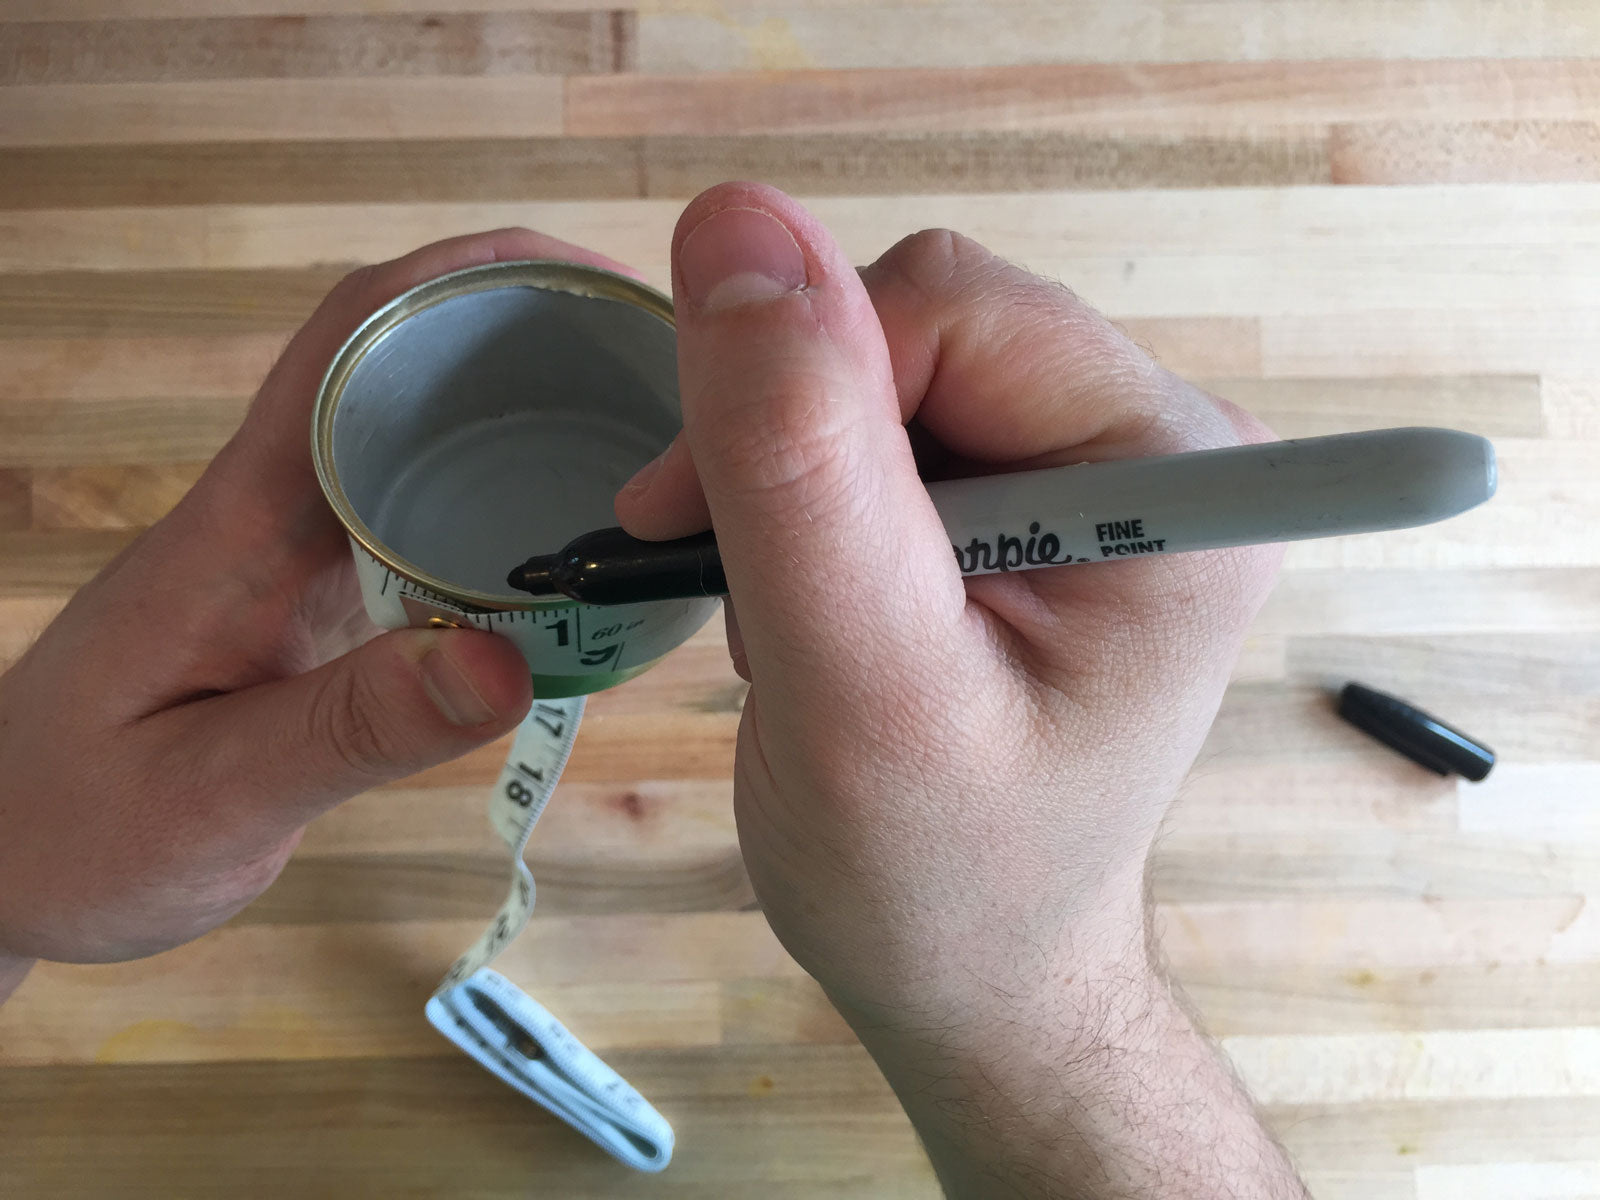
Wrap the measuring tape around the top rim of the can and mark every 1/2" as a guide for punching the first row of holes in your cat food can backpacking stove.
Step 4: Punch the First Row of Holes
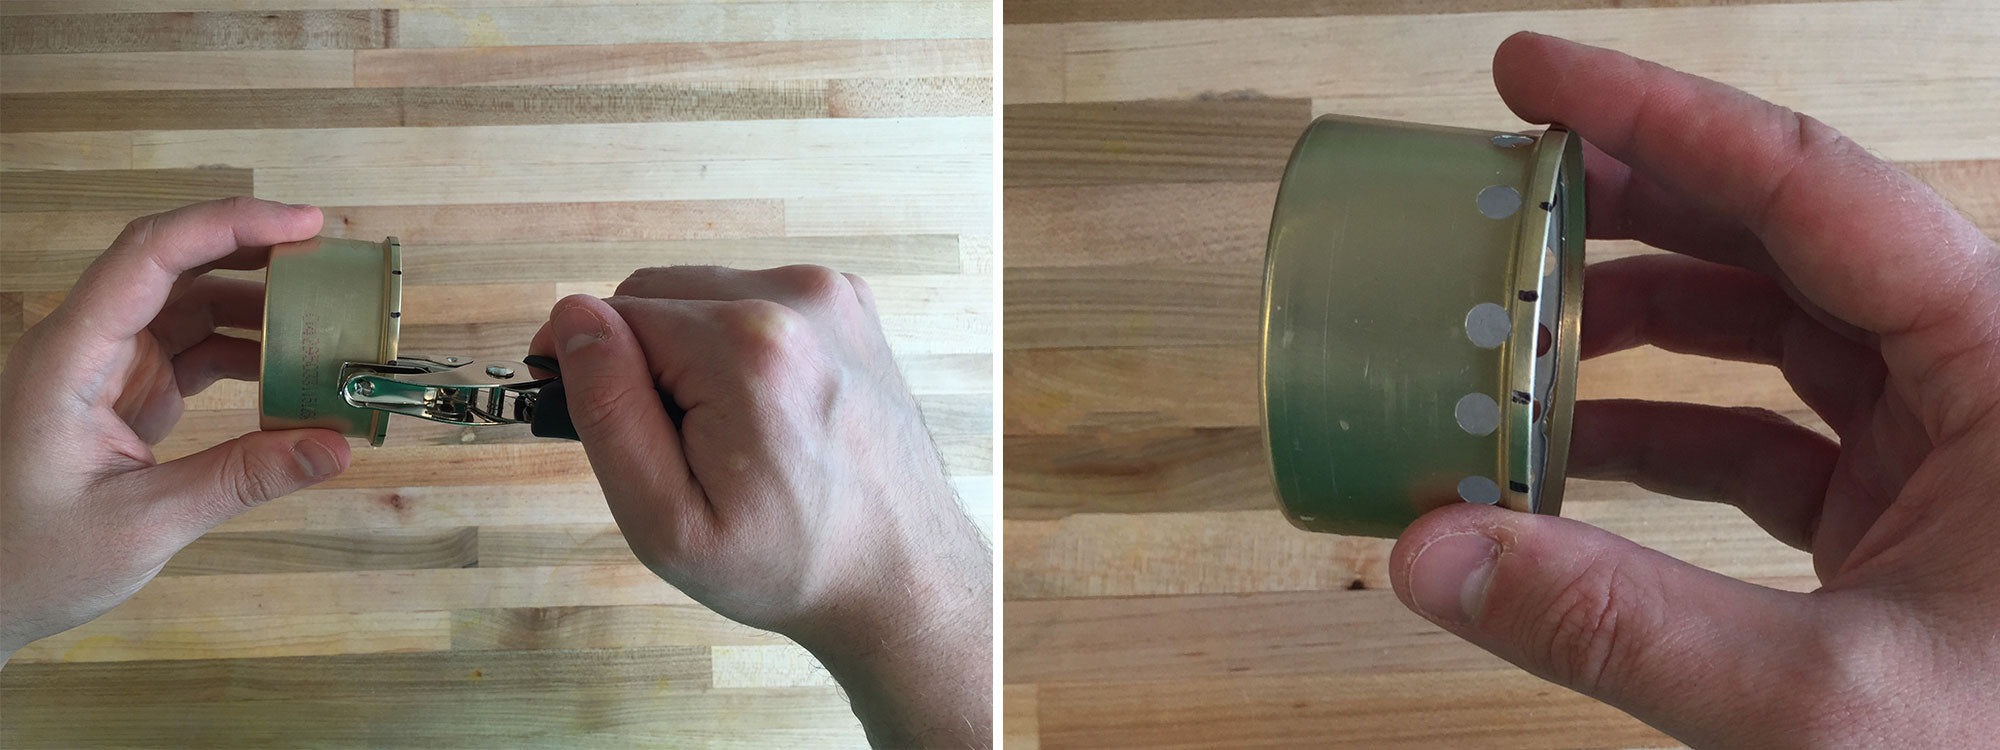
Using the marks you made in step 3 as a guide punch a row of holes just below the lip of the can. Aligning the outside edge of the hole punch with each mark will give you even distance between each hole. Don't worry if your holes aren't perfect, you can always grab another can and try again.
Step 5: Punch the Second Row of Holes
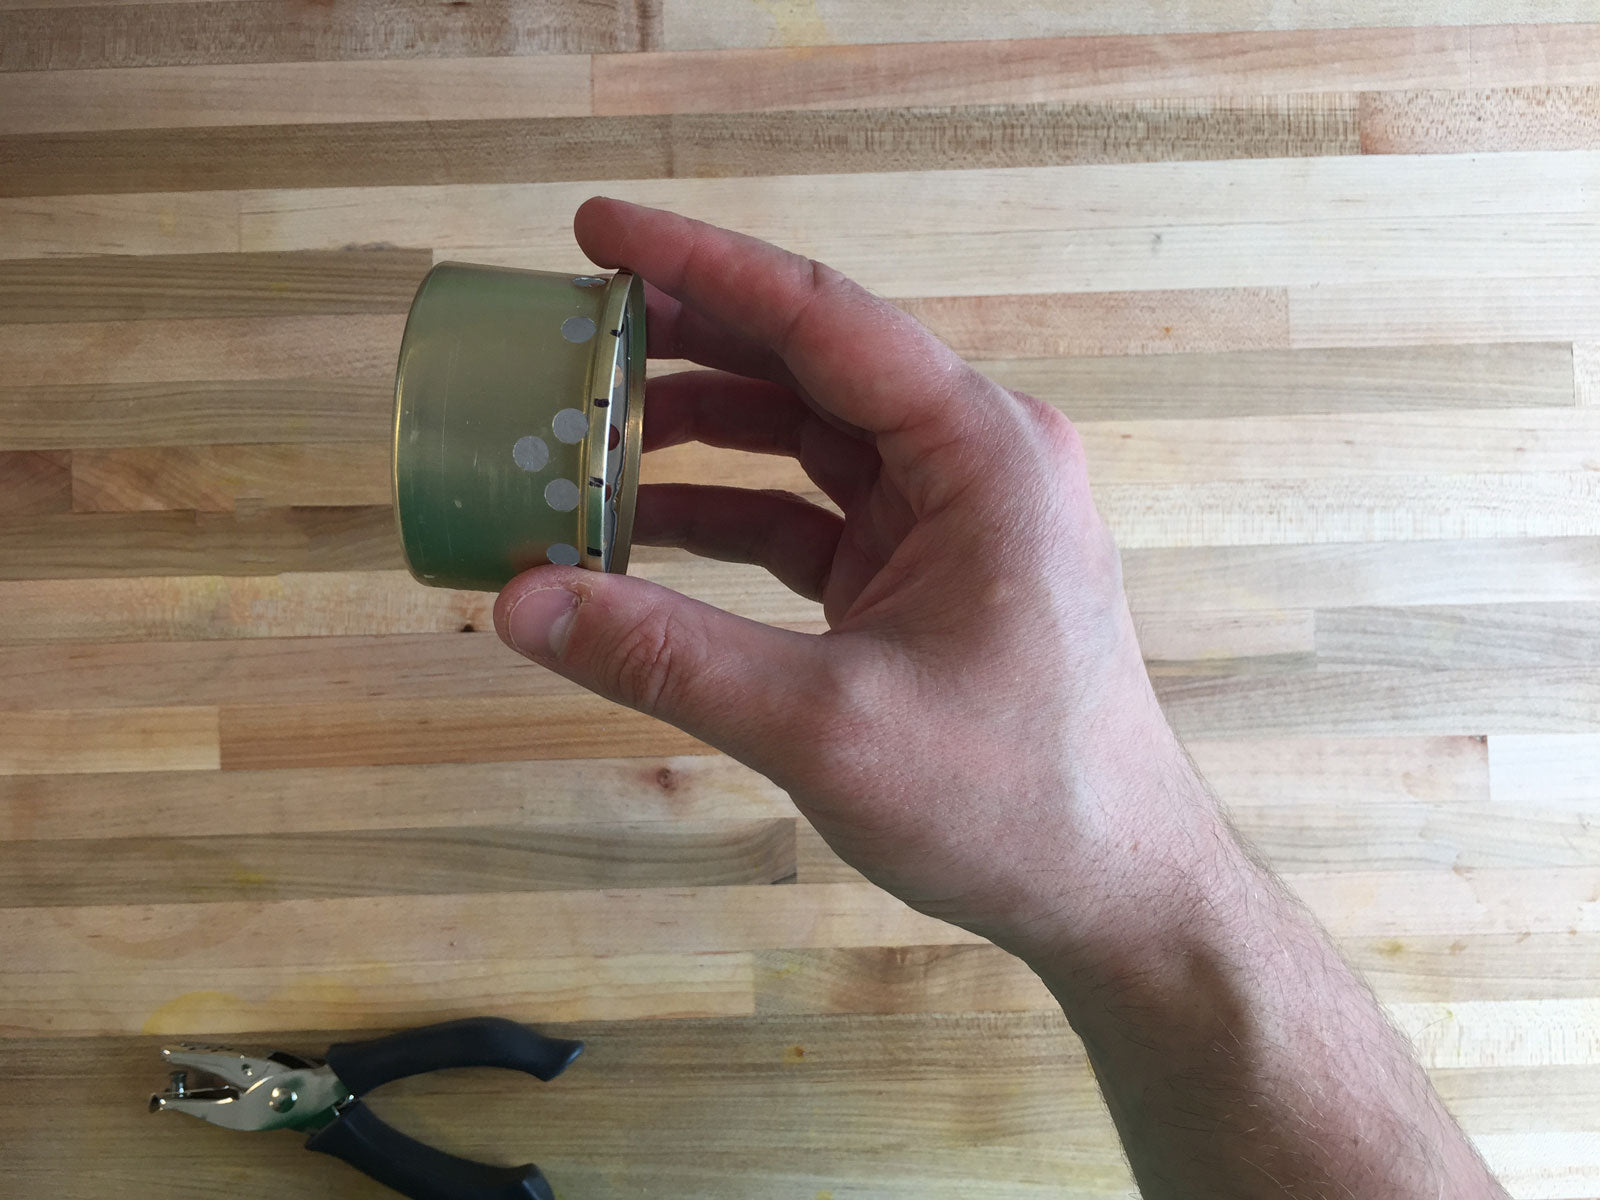
Next, punch the second row of holes just below the first row. Align the second row of holes below and in between the first row of holes, as shown below.
Step 6: Make a Foil Windscreen
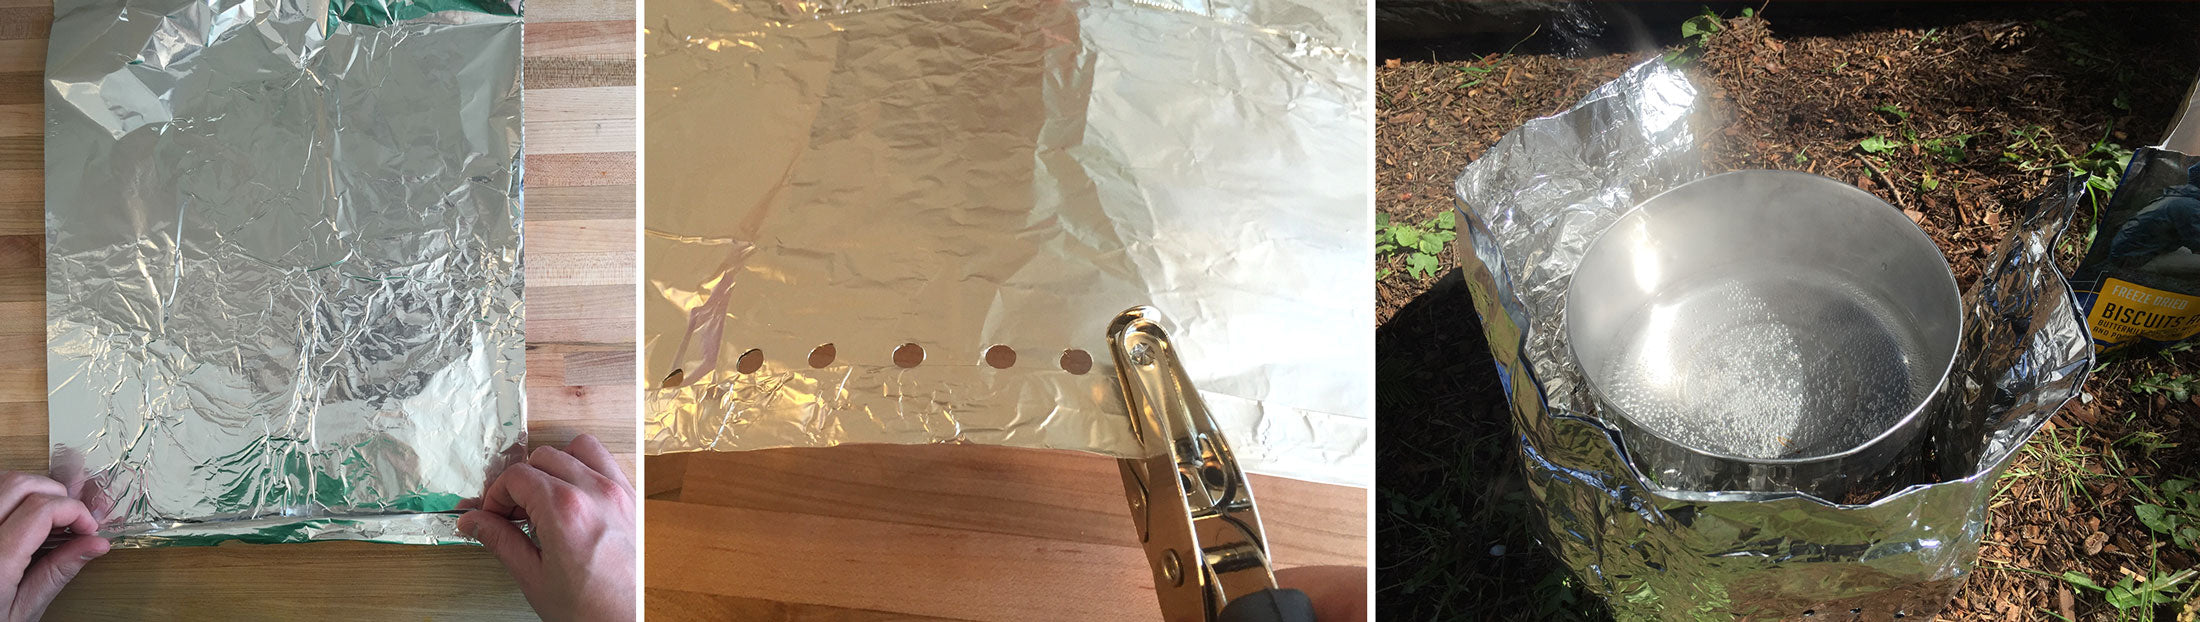
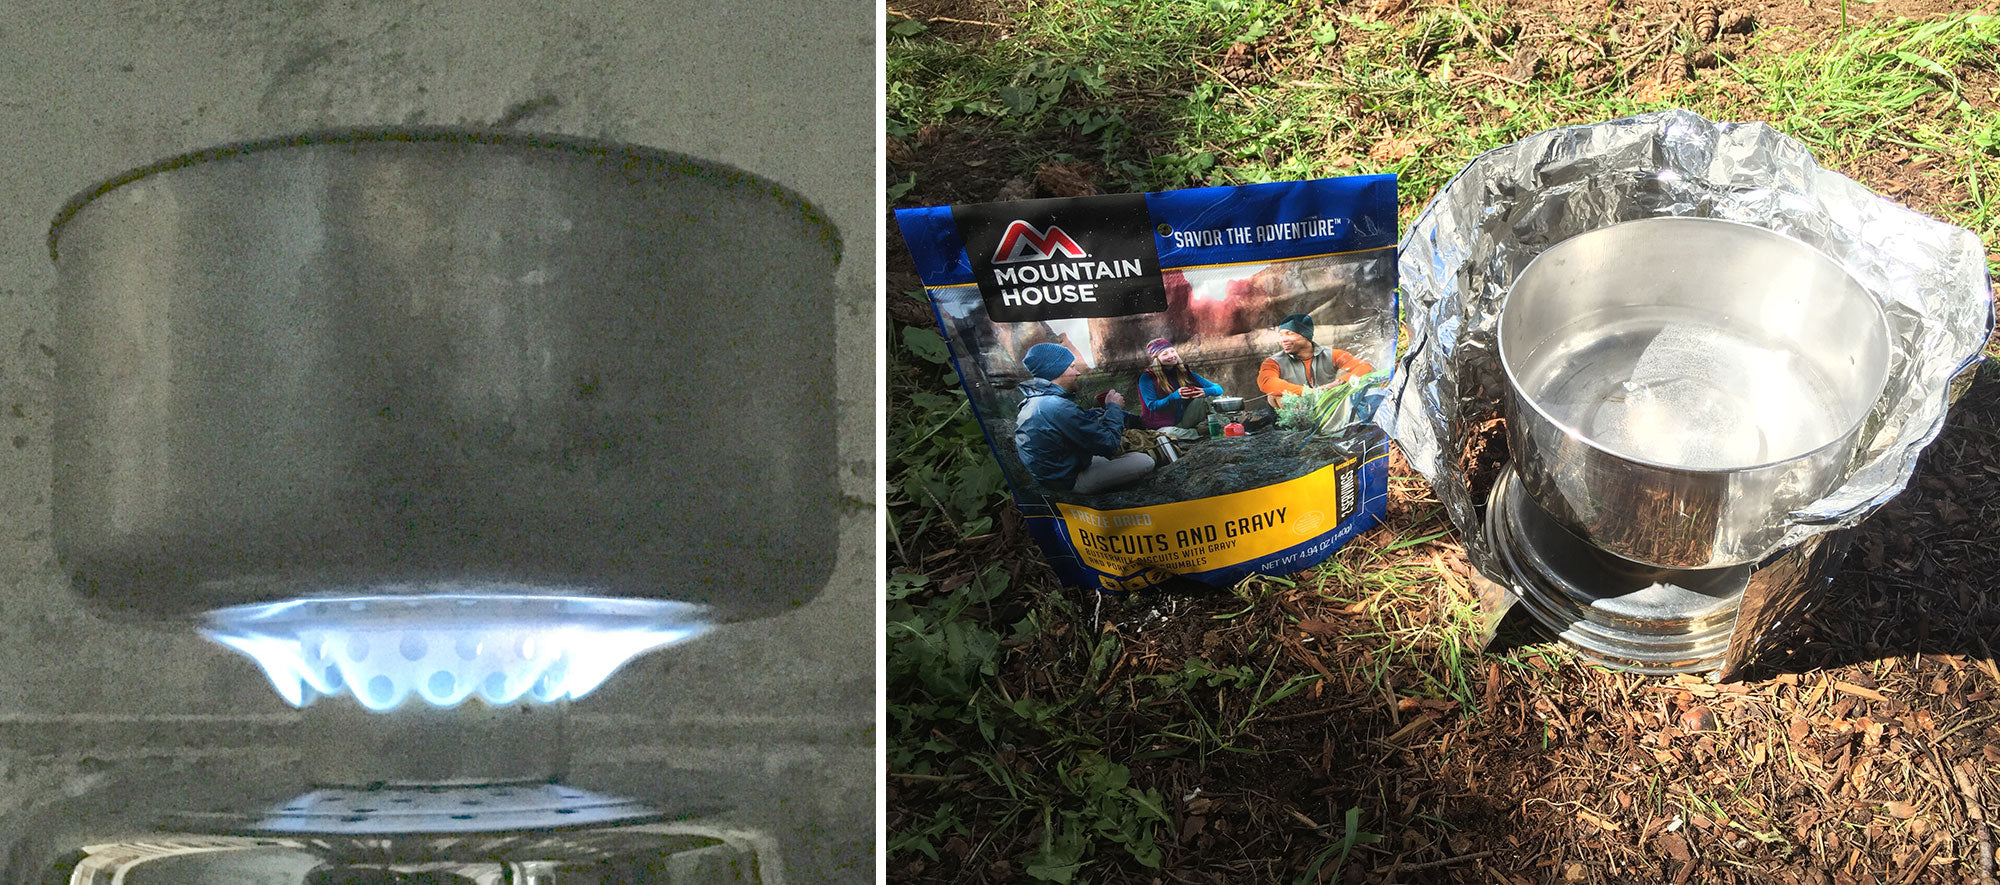
To make your cat food can stove more efficient you can use a simple foil windscreen. Customize the size based on your cooking pot, ideally, you want your screen to wrap around your pot with some space for airflow. Double Layer the foil and fold over the edges for durability and then use the hole punch to make holes along the bottom edge to provide airflow to your cat food can stove. If you're careful this windscreen will last for many trips, and if it starts to tear you can easily make a new one and put the old one in the recycle bin.
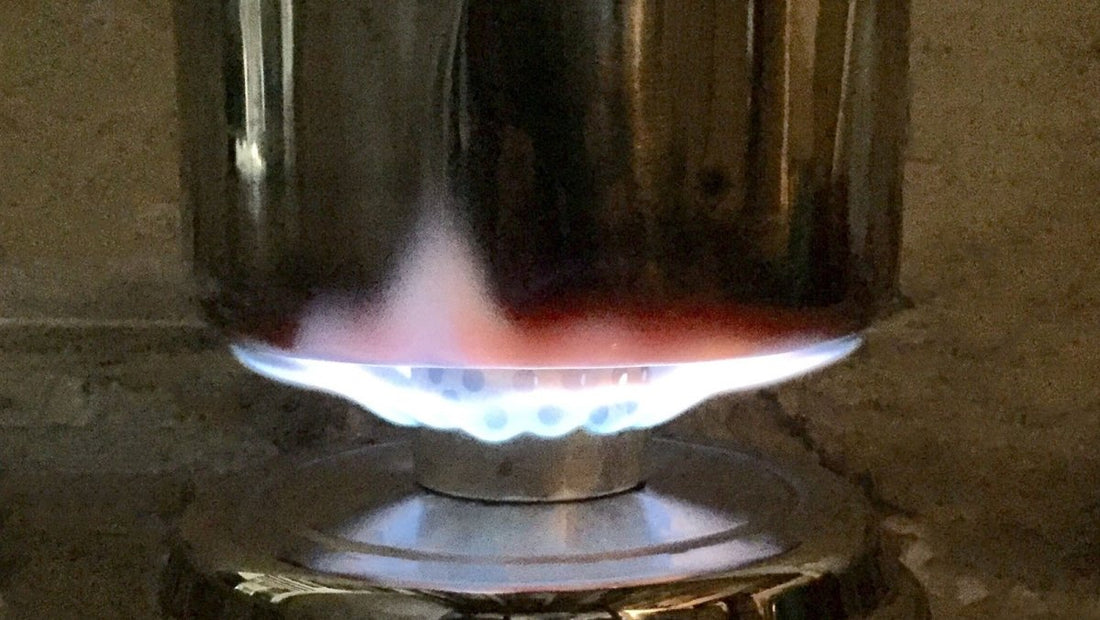
How to Use Your Ultra Light Backpacking Cat Food Can Stove
One of the great things about the cat food can stove is it can use several easy to find fuels including denatured alcohol, Heet gas line anti-freeze, and high proof grain alcohol so you can easily resupply your fuel no matter where your hiking and backpacking adventures take you.
Warning: Use caution and common sense when lighting and using your cat food can stove to avoid burns, or starting a forest fire.
- Add 1-2 ounces of fuel (depending on how much water you are boiling).
- Carefully light fuel. Lighters can be tricky with a cat food can stove, so try matches.
- Allow the fuel and stove to heat up for about 30 seconds (in daylight the flames will be hard to see).
- Fill your cooking pot with water and carefully set it on the cat food can stove (be careful to center your pot so things don't tip over!).
Congratulations on building your own cat food can ultralight backpacking stove! You should have boiling water in about 5-10 minutes, and on your way to enjoying a delicious dehydrated backpacking meal!
Next MYOG Project to tackle: UL Tin Can Wood Gas Backpacking Stove
If you'd like to have the option of finding fuel on the trail a wood gas tin can stove might be a better option than the cat food can stove. This DIY backpacking stove is a little more complicated and will require a few more tools, but don't get intimidated, the best part of these projects is if you make a mistake just grab a new can from the recycle bin. It is slightly heavier since it is created using three cans, but you save weight on the fuel and never need to worry about running out mid trip because it burns hot and efficiently with minimal fuel due to the chamber design. This allows just a few sticks, twigs, and pinecones to quickly boil water. Follow our simple simple instructions with pictures and video to make yourself an ultralight wood gas backpacking stove in 7 easy steps.