
How to Make a DIY Insulated Backpacking Meal Cozy in 5 Easy Steps
Perfectly Rehydrate Backpacking Meals with this DIY Cozy
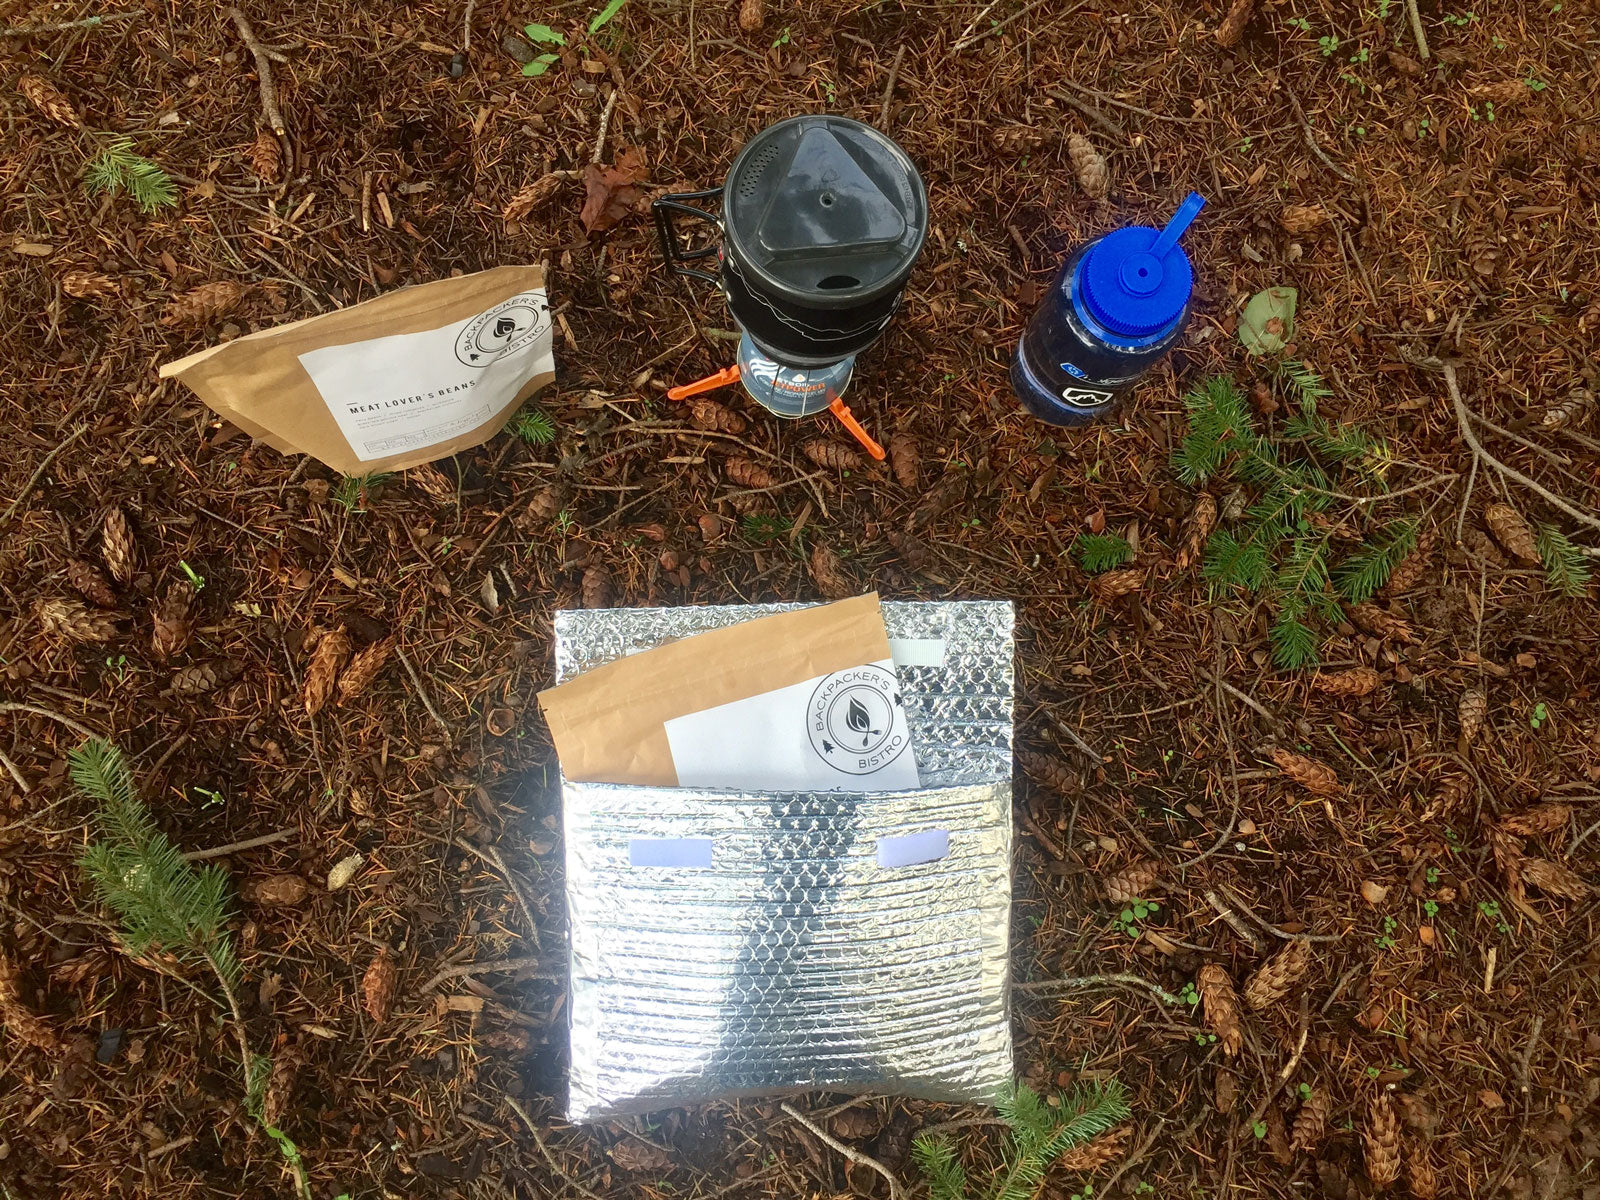
It happens to the best of us. You spend a long day hiking with a full pack and when you get to camp you're starving. You quickly prepare your dehydrated backpacking meal and when you dig into your first bite you find it's still crunchy. Maybe you didn't let your water reach a full boil, or maybe you didn't wait the 10-20 minutes most meals suggest, but either way it's too late now so you crunch your way through it. A great way to speed up the rehydration of your backpacking meals is to buy or make an insulated cozy that will hold the heat in so your meal rehydrates faster and stays warmer longer.
Pro-Tip: You might be thinking I don't need a cozy, I just tuck my meal inside my jacket and it warms me up and insulates all in one. We've done this too and it works, but it can also cause you and your clothing to smell like dinner, which is not ideal if you are in bear country.
Needed Tools and Materials
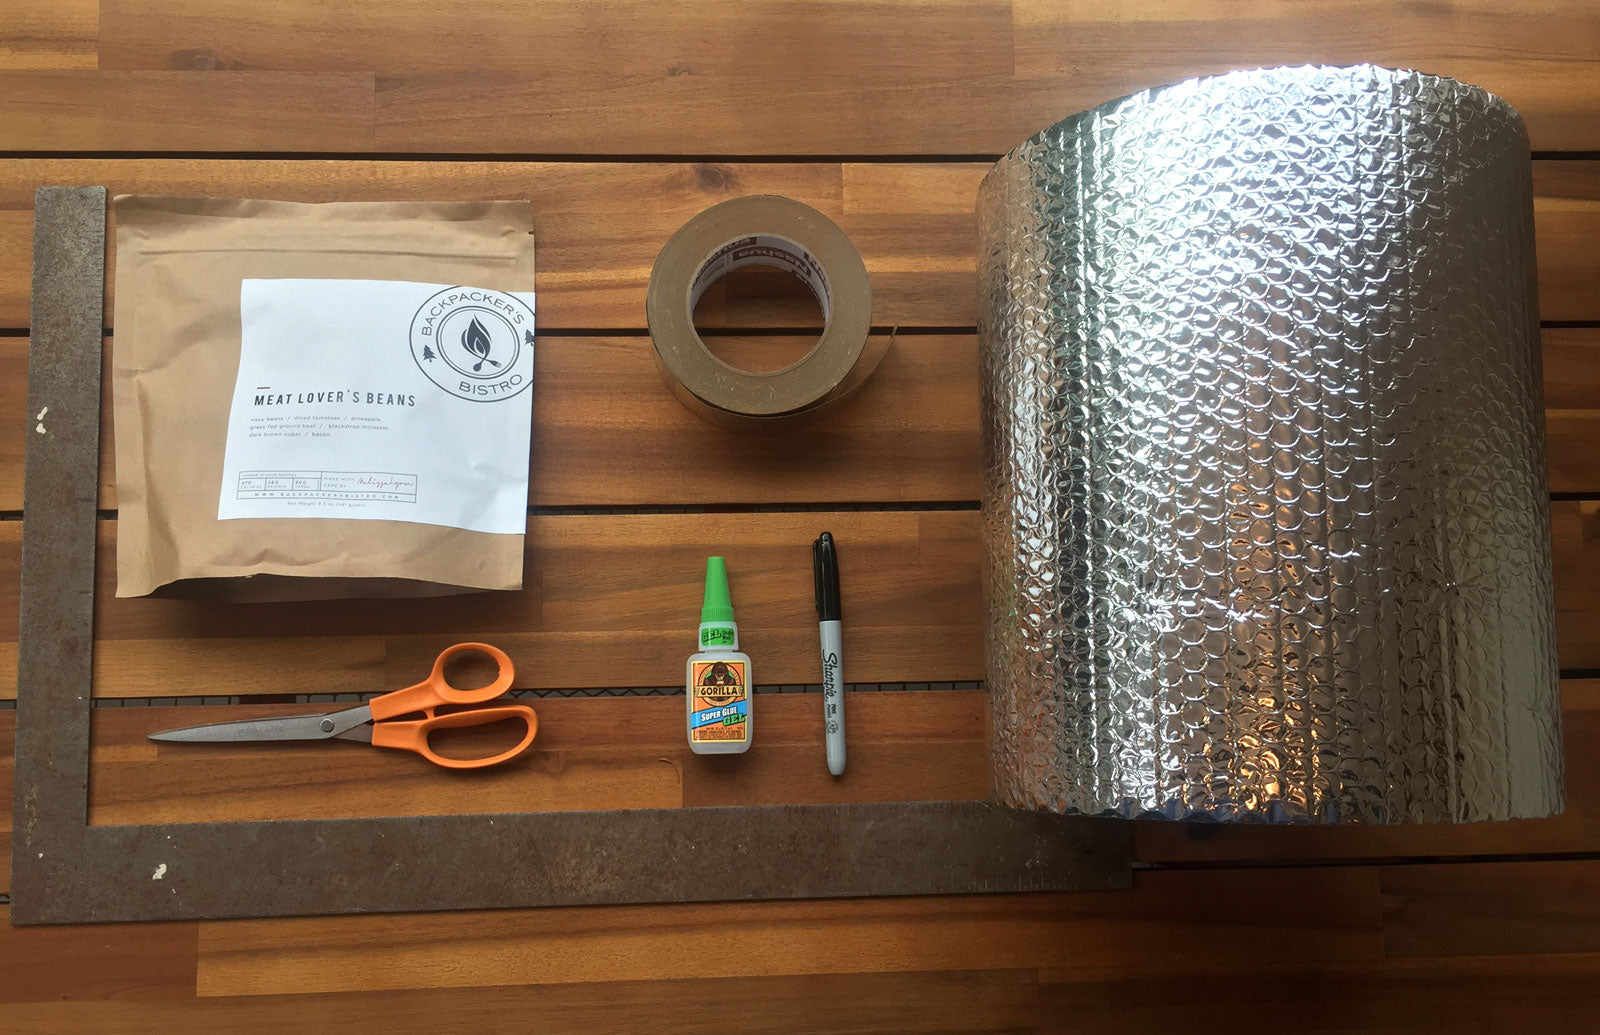
- Ruler
- Sharpie
- Scissors
- Duct Insulation
- Duct Tape
- Super Glue
- Velcro
- Backpacking Meal
Step 1: Measure the Insulation
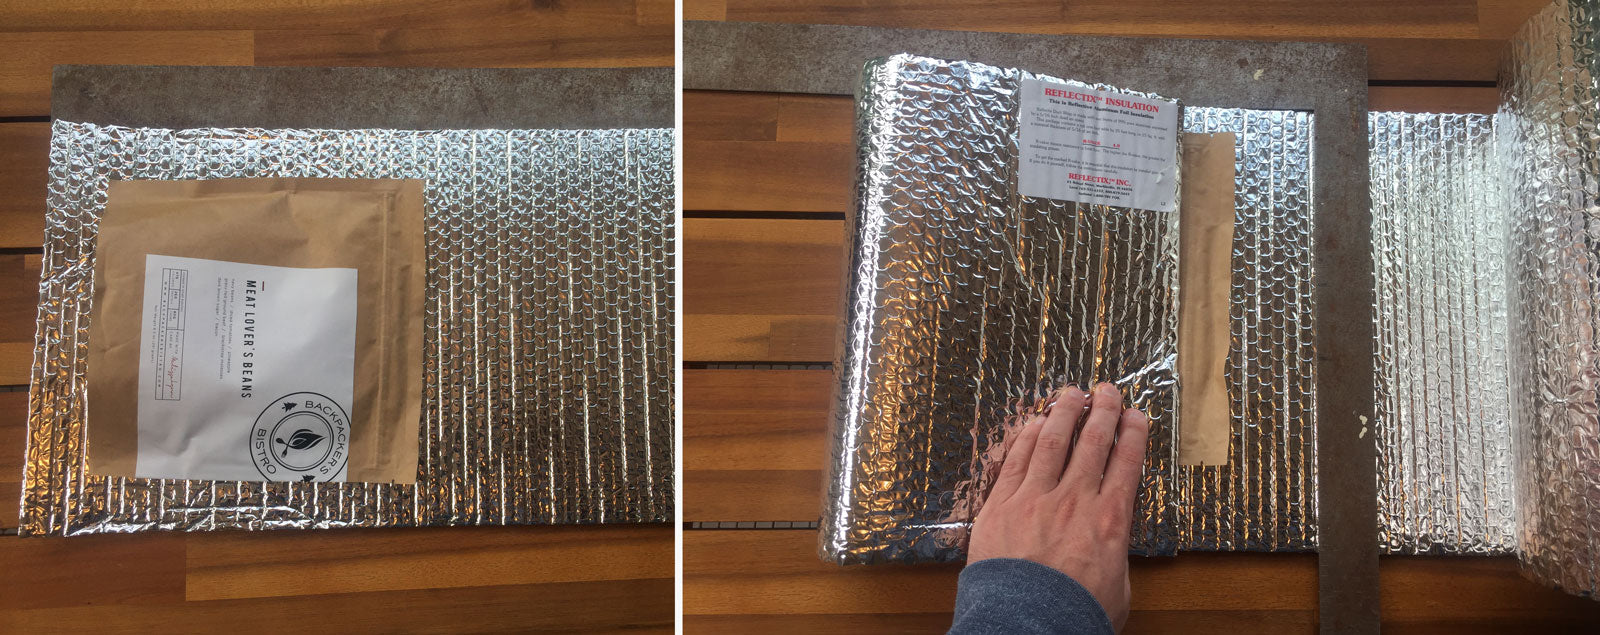
We are using common duct insulation that consists of bubble wrap glued between two layers of foil. You should find it at your local hardware store or you might be able to find a scrap piece in your garage. Your measurements will depend on your preferred meals. If you are making this cozy for homemade freezer bag meals only, custom fit it to a freezer bag. Or if you want a pouch that will fit most store bought freeze dried meals the width of the insulation roll is almost perfect, and you can save yourself some time and make only one cut. For durability and fewer seams, we will measure a single piece of insulation that can be folded to create a pouch with a fold over flap on top. Use a backpacking meal or a freezer bag as your guide, leaving 3 to 4 inches of extra insulation at the top to fold over as a lid.
Pro-Tip: If you decide to cut the width of the insulation roll, add about 2 inches to your measurements to allow room for your backpacking pouch to expand when you add the water.
Step 2: Cut Once
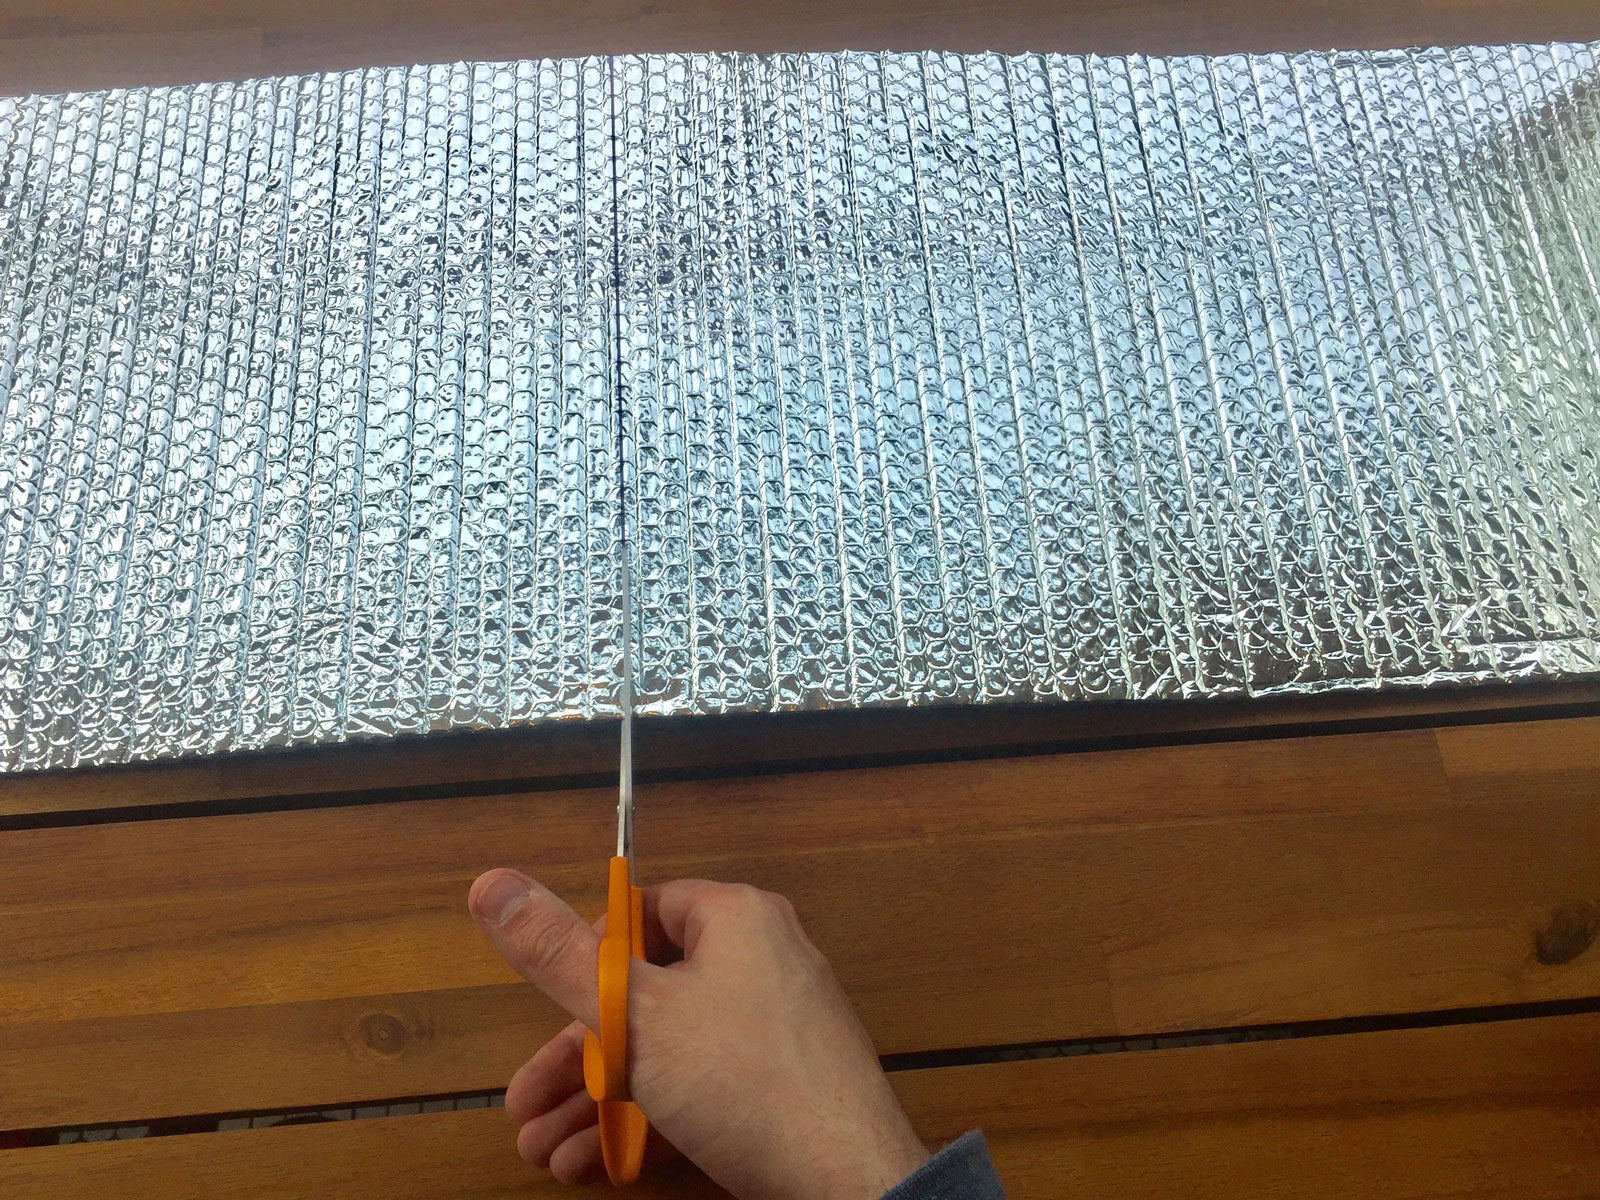
Use scissors to cut out the rectangle you measured in step one. You'll pop the bubble wrap where you cut, but don't worry about it.
Step 3: Measure and Cut the Duct Tape
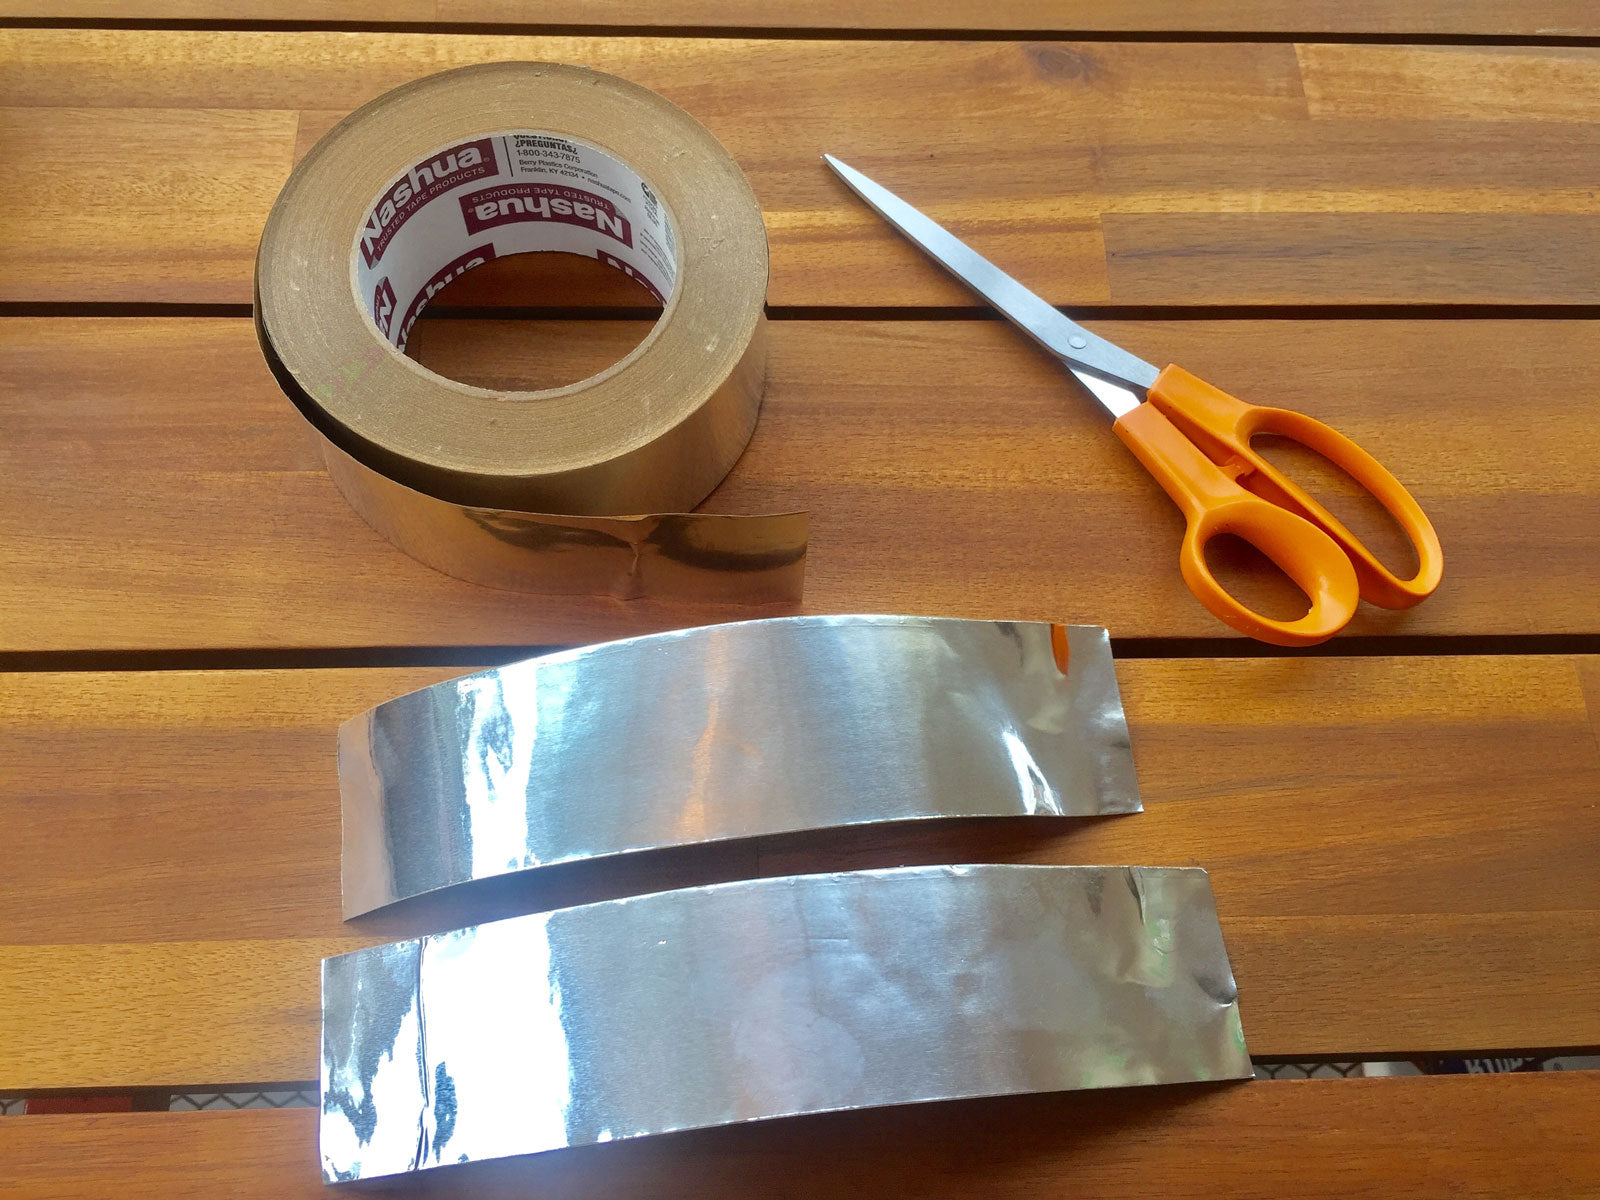
Measure and cut two lengths of duct tape. Cut it a little longer than you think you need, and then trim any excess as needed. You can also reinforce the seam with a double layer of tape for added durability.
Step 4: Fold the Pouch and Apply Super Glue and Tape
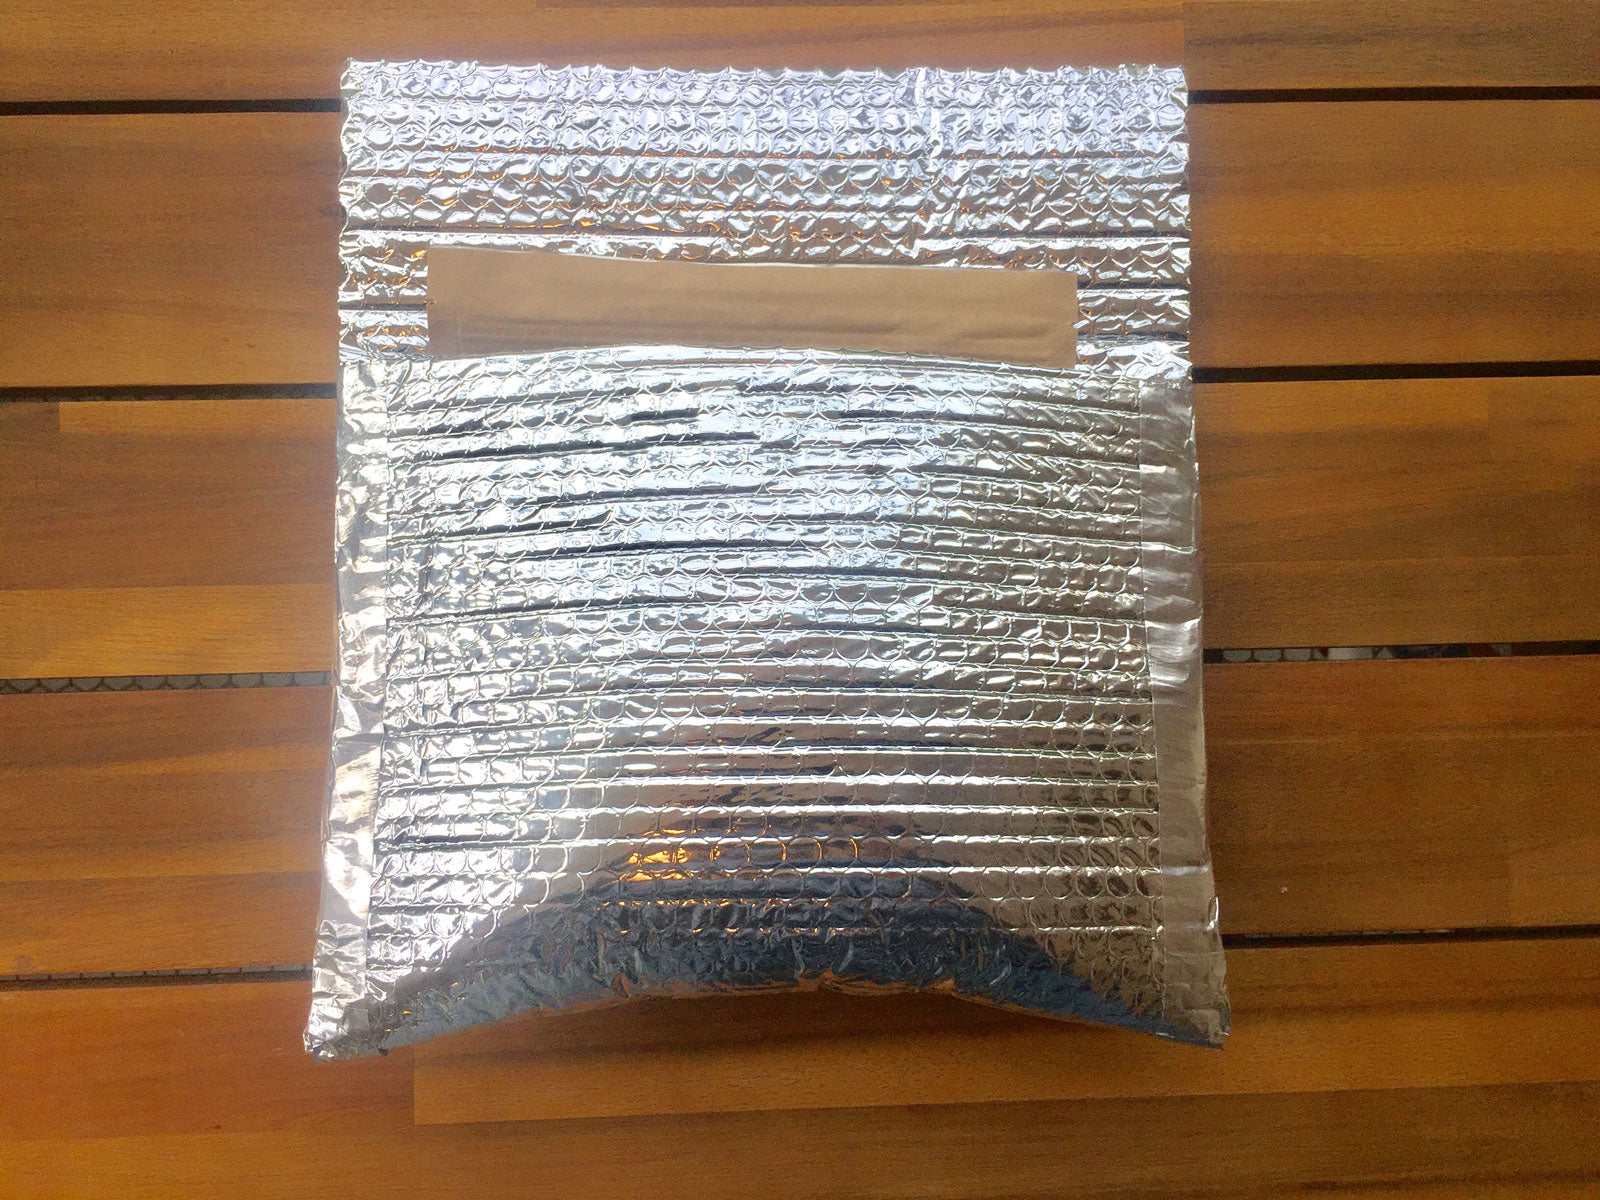
Fold the insulation from the bottom to about 3 to 4 inches from the top. Secure the side seams with a few small dabs of super glue and then cover with the duct tape.
Pro-Tip: If you have the skills you can also sew the side seam, but the combination of a few dabs of super glue and duct tape holds up almost as well.
Step 5: Add the Velcro Closure
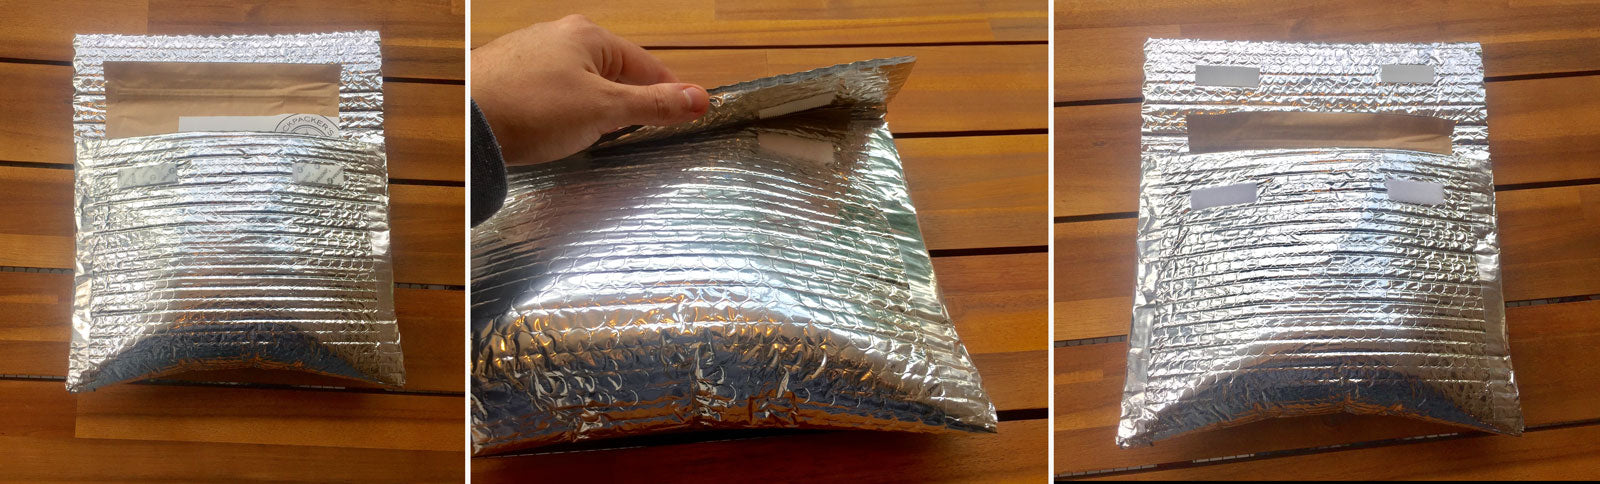
Add velcro so that the top flap can fold over and be secured to hold in heat as your backpacking meal rehydrates. To perfectly align the velcro, attach one side to the front of the pouch and then velcro the other side to it, expose the sticky backing and fold the flap over to attach.
Bonus: Your Insulated Cozy Doubles as an Ultra-Light Cooler

You can also use this cozy to keep beverages or perishable items cold on the hike to your campsite. Add a small ice pack or just add pre-chilled items and the added insulation should keep them cool long enough for you to enjoy them on the first night of your backpacking trip.

1 comment
Great instructions Austin, it worked out well! Really appreciate it. Just a quick note for cheapies like me, I bought a car window shade for $0.99 made out of the same material and just cut my cozy out of that. Good hiking!