How to Make a Paracord Wilderness Survival Bracelet
A Paracord Bracelet has Many Survival Uses
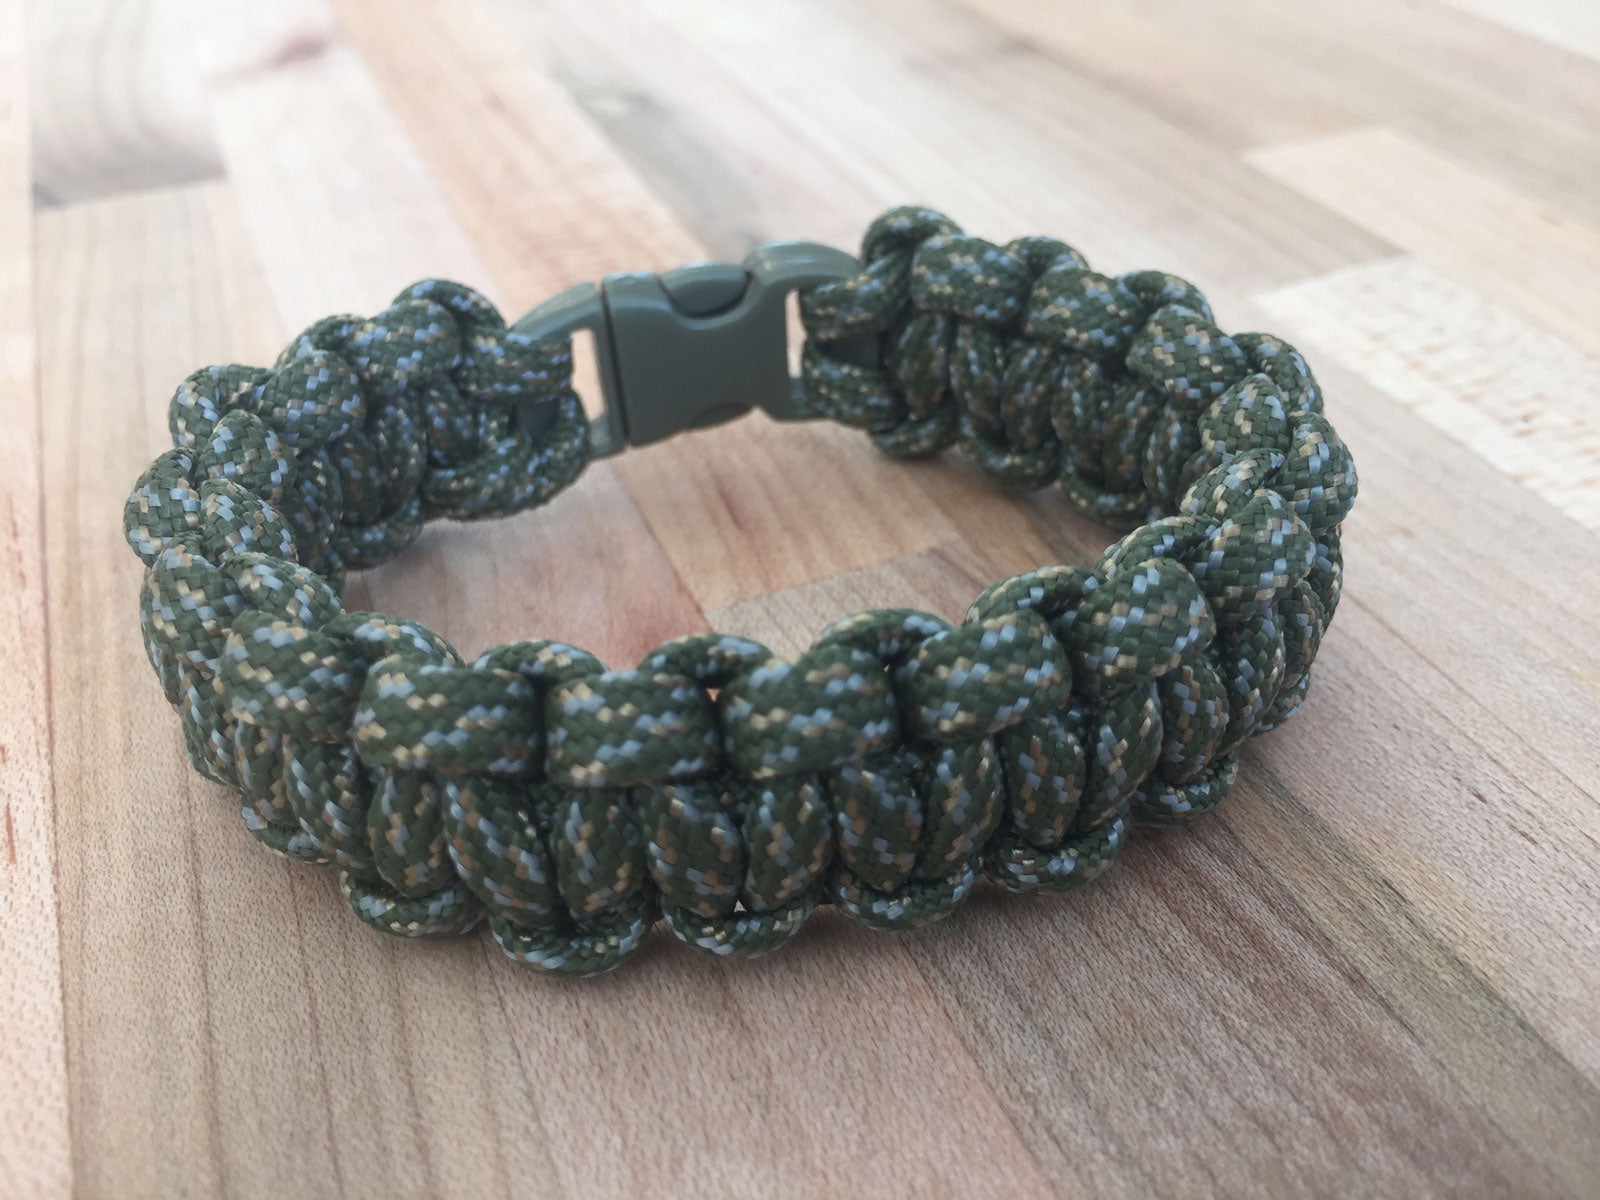
This article will show you easy step-by-step instructions for how to make a paracord wilderness survival bracelet that can be worn when hiking and backpacking. A basic paracord bracelet contains 8-10 feet of continuous cord that in an emergency can be used for snares, lashings, shoelaces, tourniquets, or tying a splint. The cord is also made of 7 inner threads that can be separated to create up to 70 feet of string for fishing line, sewing, and gear repair, or lighter duty lashings.
Video Overview of Making a Paracord Survival Bracelet
Gather the Needed Materials
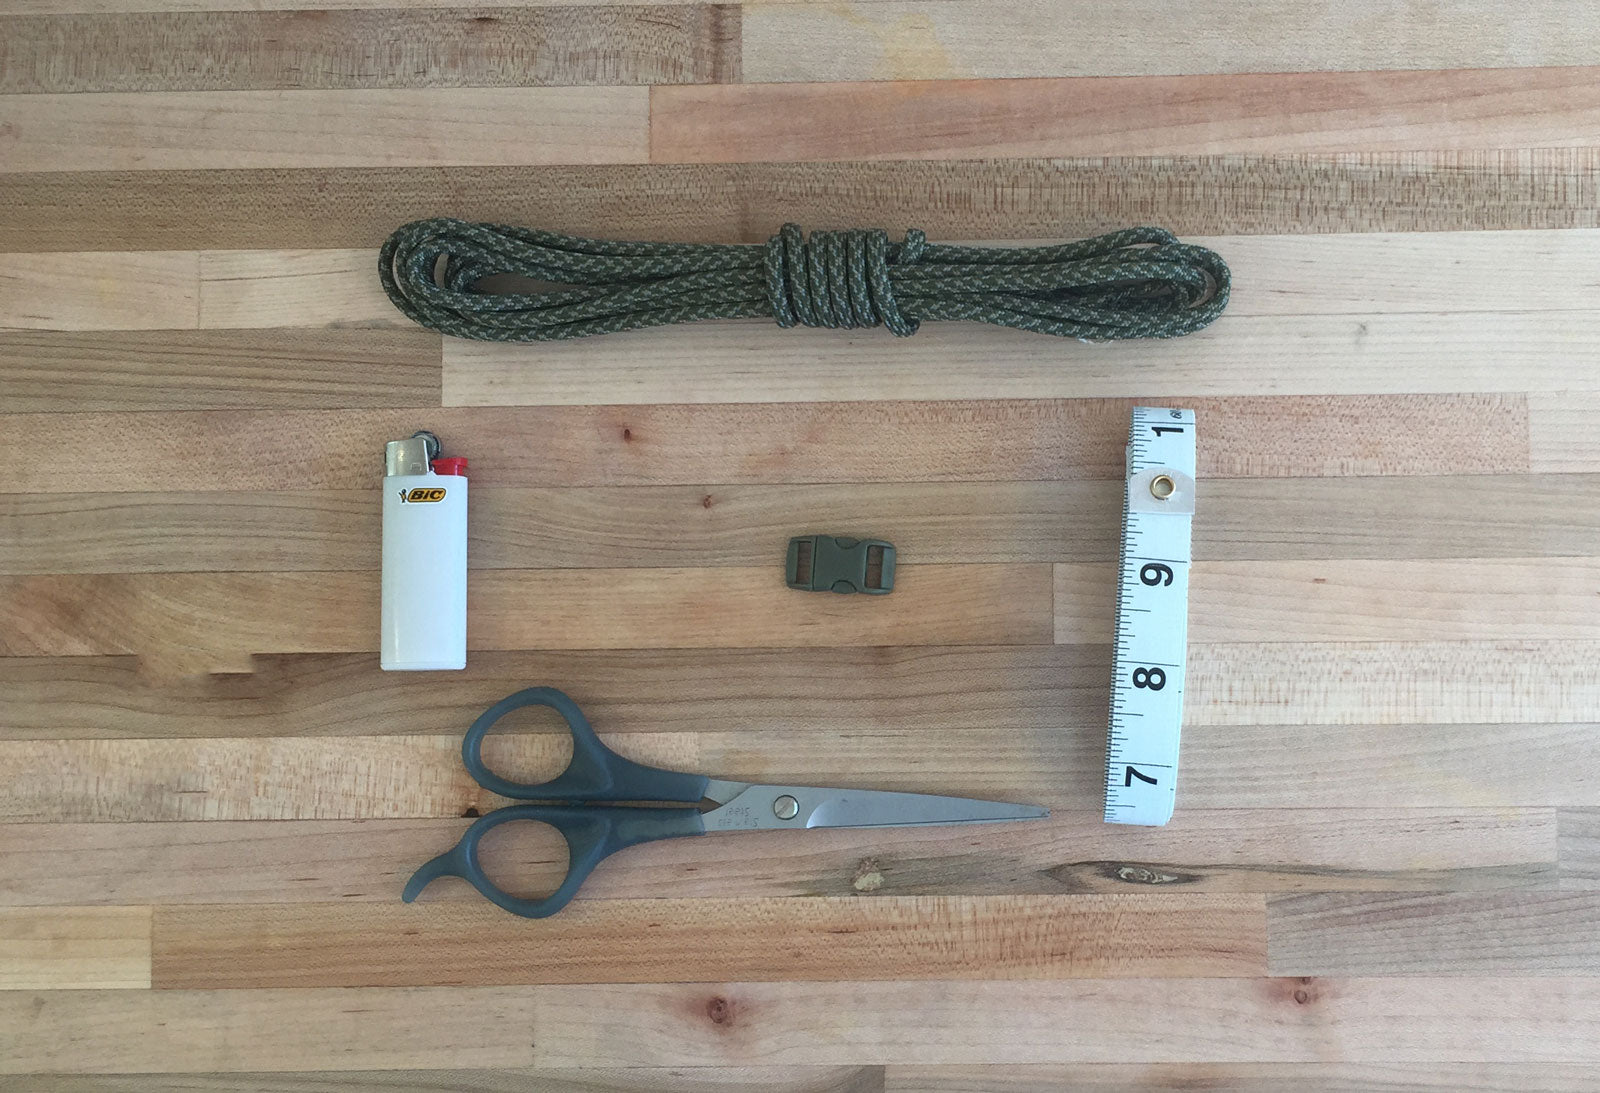
- 10 Feet of Paracord
- A Side Release Buckle
- Measuring Tape or Ruler
- Scissors or knife
- Lighter
Paracord and buckles can be found on Amazon. We used a kit that included paracord and buckles to make 10 survival bracelets from Paracord Planet because they are made in the USA.
Step 1: Measuring Your Wrist
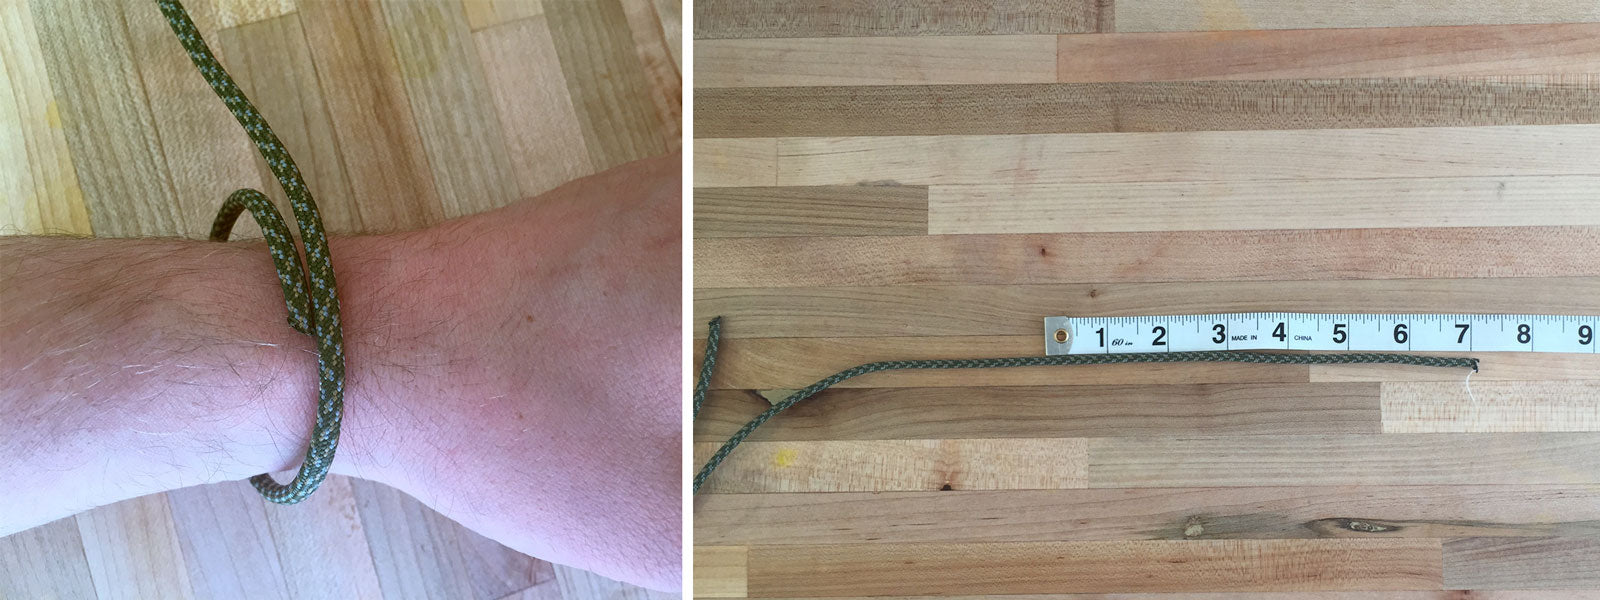
To determine the length of your bracelet, loosely wrap some paracord around your wrist and note the spot the cord meets. Next, use a measuring tape to measure that length and then add 1 inch to the measurement. Remember this number.
Step 2: Thread and Attach the Female Clip to the Paracord
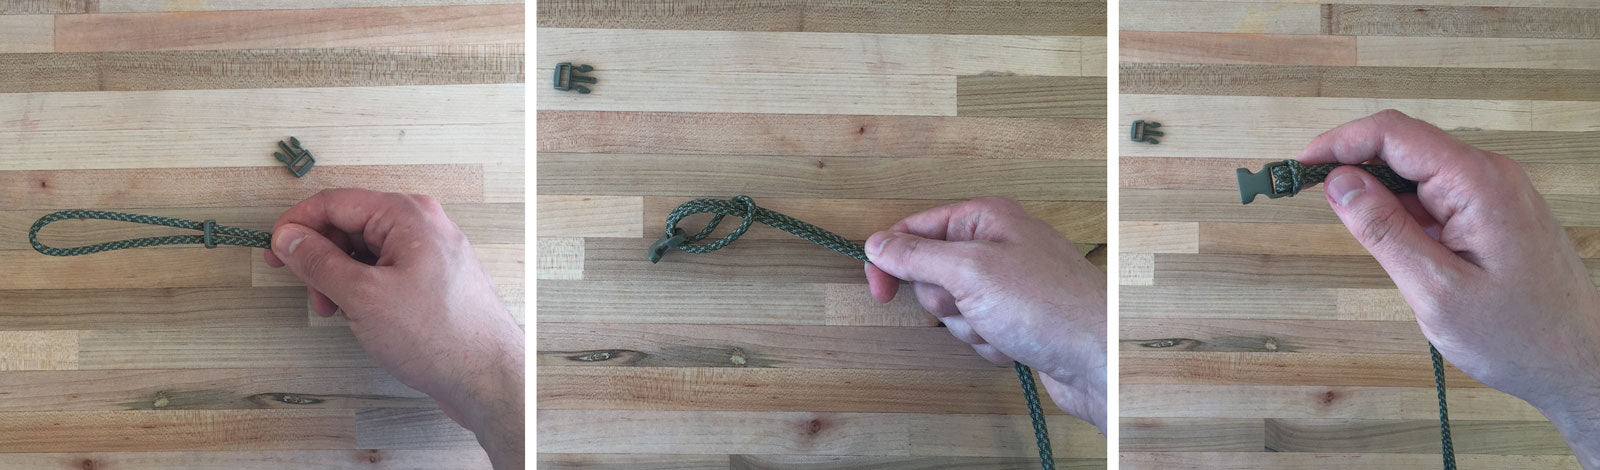
Fold the 8-10 foot length of paracord exactly in half. Take the release buckle apart. Thread the ends of the paracord through the female piece of the buckle then pass them through the loop you created as shown above. This will attach the paracord to the buckle. Cinch the cord tight.
Step 3: Thread the Paracord through the Male Clip to the Measured Length
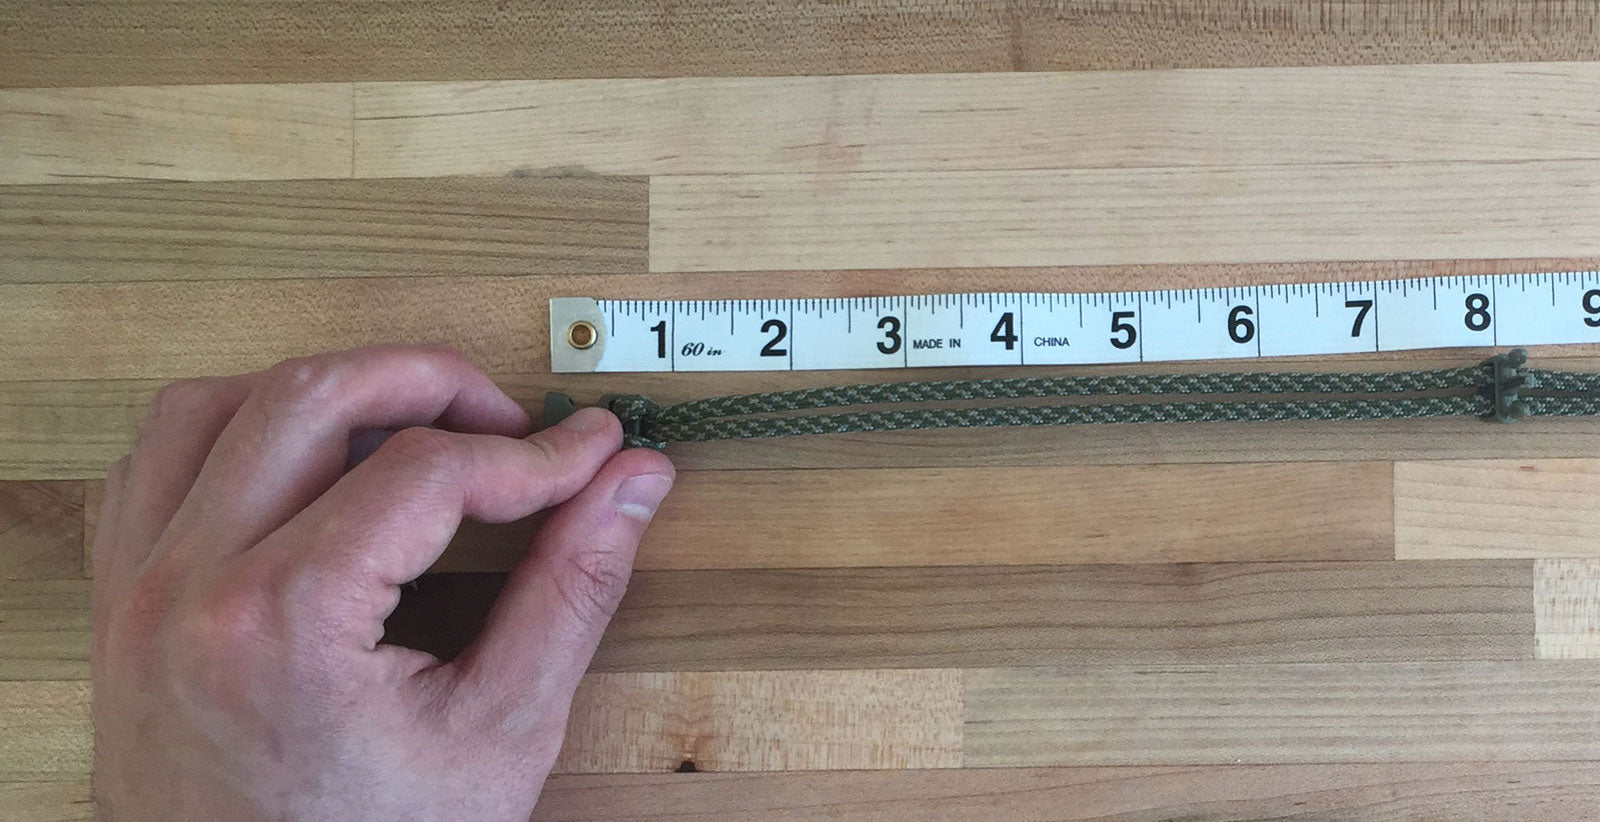
Next, thread the male end of the side release buckle onto the paracord, sliding it down until the distance between the two pieces of buckle is equal to the number you noted earlier, (remember to add the 1 inch!) Be sure to measure from the end of the female buckle to the edge of the male buckle that meets the female buckle when closed. See above.
Step 4: Tie the Cobra Stitches that will Will Create the Paracord Bracelet
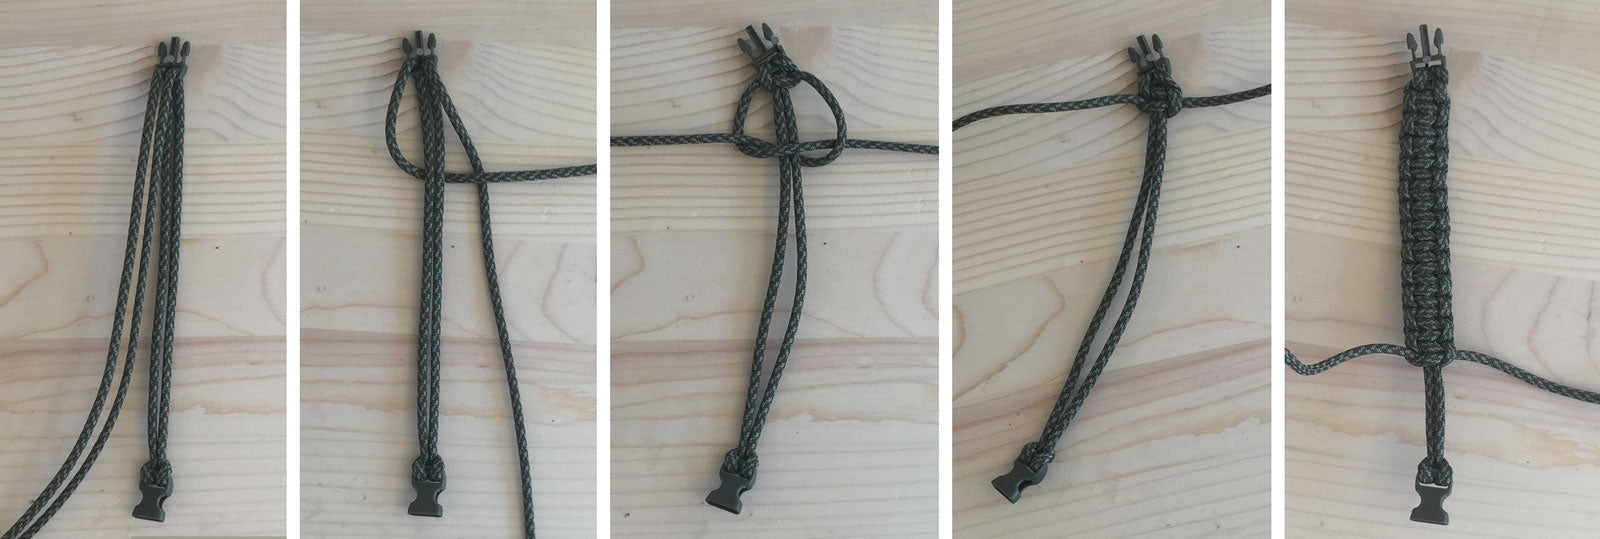
There are many variations and ways to tie a paracord bracelet, but the most common is to use an alternating Cobra Stitch.
Important: Double check that your bracelet is the correct length before starting or you may end up undoing every Cobra Stitch to adjust the length.
How to Tie an Alternating Cobra Stitch
- With the paracord laid out, as shown above, pass the left loose end under the 2 center cords and then over the loose end on the right.
- Next, pass the loose cord on the right over the 2 center cords and through the loop on the left side and tighten (similar to a granny knot).
- Repeat steps 1 and 2, but starting from the right side this time.
Continue the alternating Cobra Stitches until the knots have filled the bracelet down to the male end of the side release buckle. If you accidentally forget to alternate you will notice the bracelet will start to twist, and you can undo your last knot and try again.
Step 5: Finishing the Paracord Bracelet
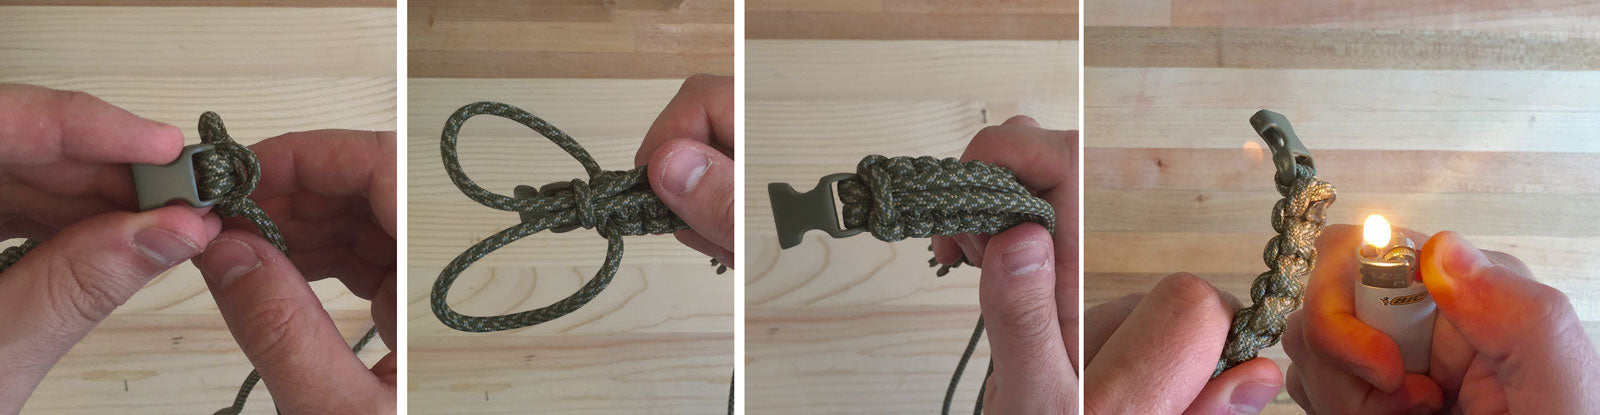
Try on your bracelet to make sure it fits comfortably, with enough room to fit a finger under. If it is too loose or too tight you can undo your knots, adjust the length and try again.
Once you are sure that your paracord bracelet fits well, pull the loose ends through the loop attaching the female end of the side release clip as shown above. Finally, trim and melt the ends and use the scissors or a butter knife to flatten the melted end into the bracelet.
Caution: Be careful not to burn yourself when melting the ends.
Congratulations on Making Your First Paracord Survival Bracelet!
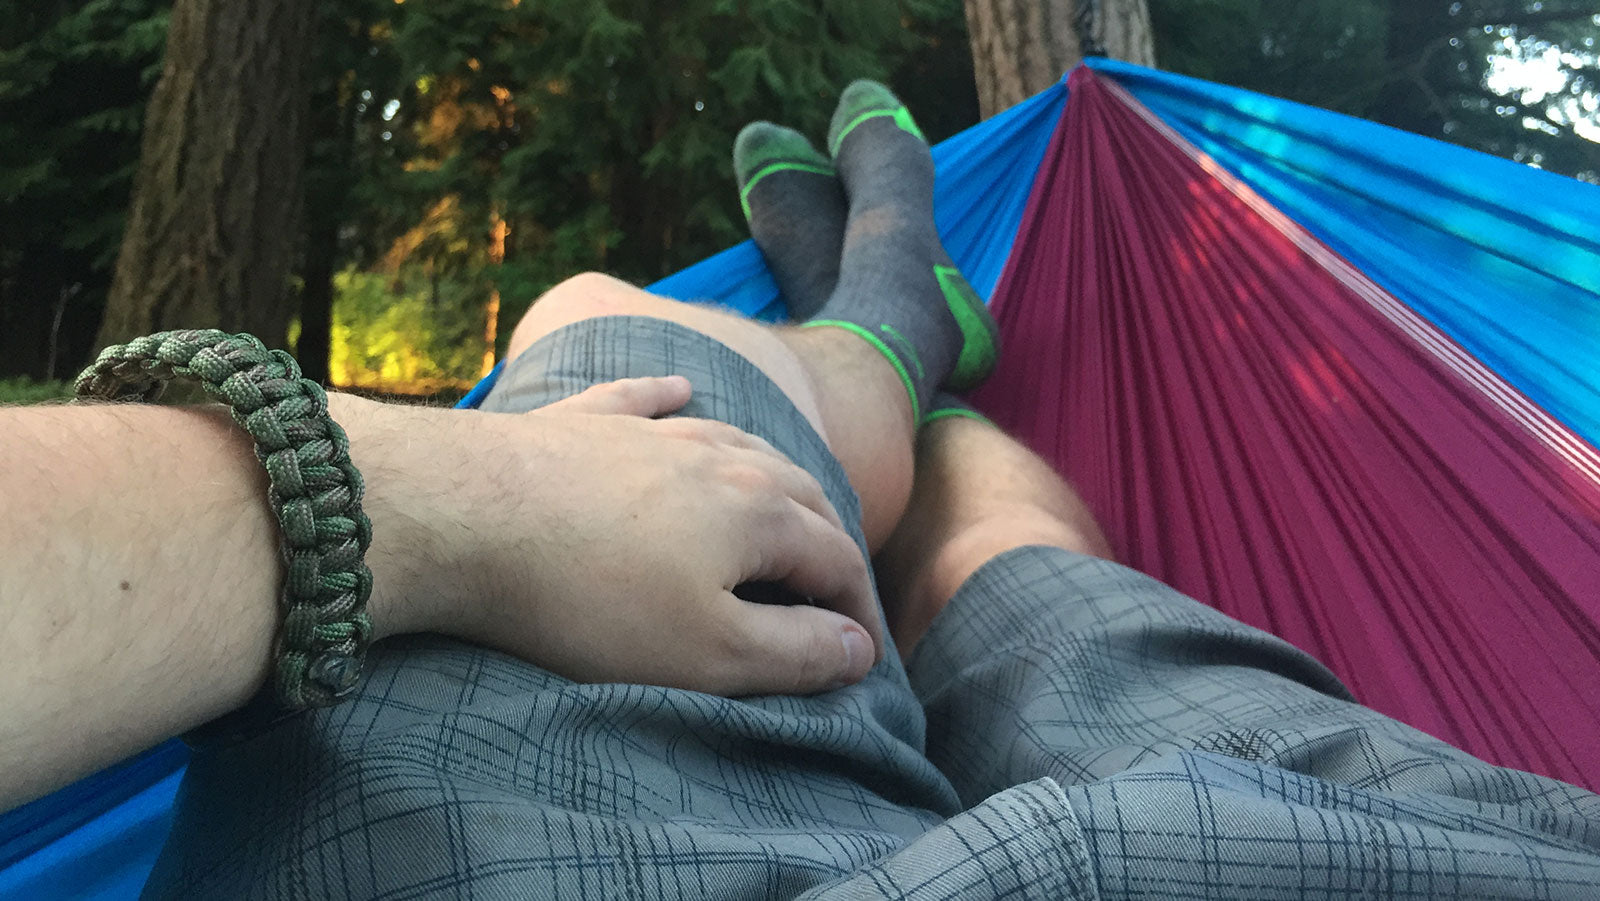
We hope you never need to use it, but if you encounter an emergency situation while hiking or backpacking we hope that your paracord bracelet comes in handy.